What Is PicoTorrent and Why You’ll Love It

Before you begin your PicoTorrent download, here’s why PicoTorrent stands out:
-
Ultra-Lightweight
At just a few megabytes in size, PicoTorrent uses minimal RAM and CPU—ideal for older PCs or background downloads. -
Ad-Free & Open Source
No bundled toolbars or ads. The code lives on GitHub under the MIT license, so the community audits it regularly. -
Native Windows Integration
Built with C++ and rasterbar-libtorrent, PicoTorrent uses native Windows API calls for a seamless user experience. -
Essential Torrent Features
-
Supports BitTorrent v1 & v2
-
Peer discovery via DHT, PeX, and LSD
-
UPnP port mapping for easy connectivity
-
WebSocket API and scripting via PQL for automation
-
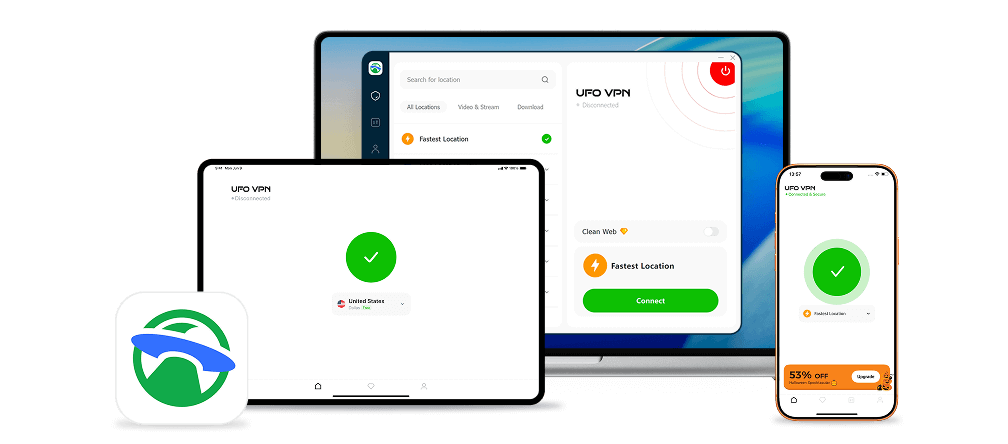
If you are in India and still worried about the security of seed downloads, we highly recommend you to use this India vpn, whether you are on mac or windows, UFO VPN for PC - best free VPN and free VPN for Mac - UFO VPN are available for you to choose.
PicoTorrent Download: Step-by-Step Installation
Follow these steps for a safe PicoTorrent download and install:
-
Visit the Official Site
-
Go to picotorrent.org to ensure you get the latest, unmodified installer.
-
-
Choose Your Build
-
Installer (.exe): Easy setup for most users.
-
Portable Zip: Unzip anywhere; no installation required—but requires Visual C++ 2019 runtime.
-
-
Download the File
-
Click the “Download” button. Your browser will fetch a small installer (~6 MB).
-
If you choose the portable zip, save and extract to a folder you control.
-
-
Verify Integrity (Optional)
-
On GitHub releases, note the SHA-256 checksum. After download, run a checksum tool to confirm the file matches.
-
-
Run the Installer
-
Double-click the
.exe. -
On Windows SmartScreen warning, click More info → Run anyway (only if downloaded from the official site).
-
Choose install location and shortcuts.
-
-
Launch PicoTorrent
-
After install, run PicoTorrent from Start Menu or desktop shortcut.
-
For portable version, open the extracted folder and run
PicoTorrent.exe.
-
-
Initial Setup
-
On first launch, PicoTorrent asks for a download folder. Pick a folder with ample space.
-
Optionally enable Port Mapping in Preferences → Connections → UPnP/NAT-PMP.
-
Congratulations—your PicoTorrent download and install are complete! Next: how to use PicoTorrent to download torrents.
How to Use PicoTorrent: Basic Operations

Getting torrents started in PicoTorrent is straightforward. Here’s exactly how to use PicoTorrent for everyday tasks:
1. Adding a Torrent
-
Via .torrent File:
-
Click File → Add Torrent File… or press Ctrl + O.
-
Browse to a
.torrentfile and open it. -
In the dialog, choose download path and confirm.
-
-
Via Magnet Link:
-
Copy a magnet link (e.g., from a torrent index).
-
Click File → Add Magnet Link… or press Ctrl + M.
-
Paste the magnet URI and click OK.
-
2. Managing Active Torrents
-
Pause/Resume: Right-click a torrent → Pause or Resume.
-
Stop/Remove: Right-click → Remove to delete from the list (choose whether to delete data).
-
Prioritize Files: In the torrent details pane, right-click a file → Set Priority (High/Normal/Low/Skip).
3. Monitoring Progress
-
Download/Upload Speed: View real-time rate in the status bar.
-
Peers & Seeds: Switch to Transfers → Peers tab to see connected peers and their IPs.
-
ETA & Progress: Percent complete, ETA, and downloaded size shown in the main list.
4. Configuring Preferences
Open Options → Preferences to adjust:
-
Connections:
-
Max Upload/Download Rate: Throttle speeds to avoid saturating your network.
-
Max Connections: Limit global and per-torrent peers.
-
-
Port Binding:
-
Manually specify listening port or leave blank for random. If you enable UPnP, PicoTorrent maps the port automatically.
-
-
General:
-
Start on Windows boot, Minimize to tray, Check for updates.
-
-
Advanced:
-
Enable/disable DHT, LSD, PeX as needed.
-
Apply IP filtering blocklists to block malicious peers.
-
Now you know the essentials of how to use PicoTorrent for your daily torrents. For extra privacy and performance, read on for advanced tips with VPN.


PicoTorrent Tips: Speed, Security & VPN

Once you’ve mastered the basics, elevate your torrenting with these advanced tips, including using free proxy VPN - UFO VPN.
1. Integrate UFO VPN for Privacy
Protect your IP and avoid ISP throttling with UFO VPN:
-
Download UFO VPN:
Step 1Download UFO VPN for WindowsGrab the free Windows VPN installer right below. UFO VPN is lightweight and secure on all Windows systems. Double-click the downloaded file and complete the installation. Once installed, launch UFO VPN.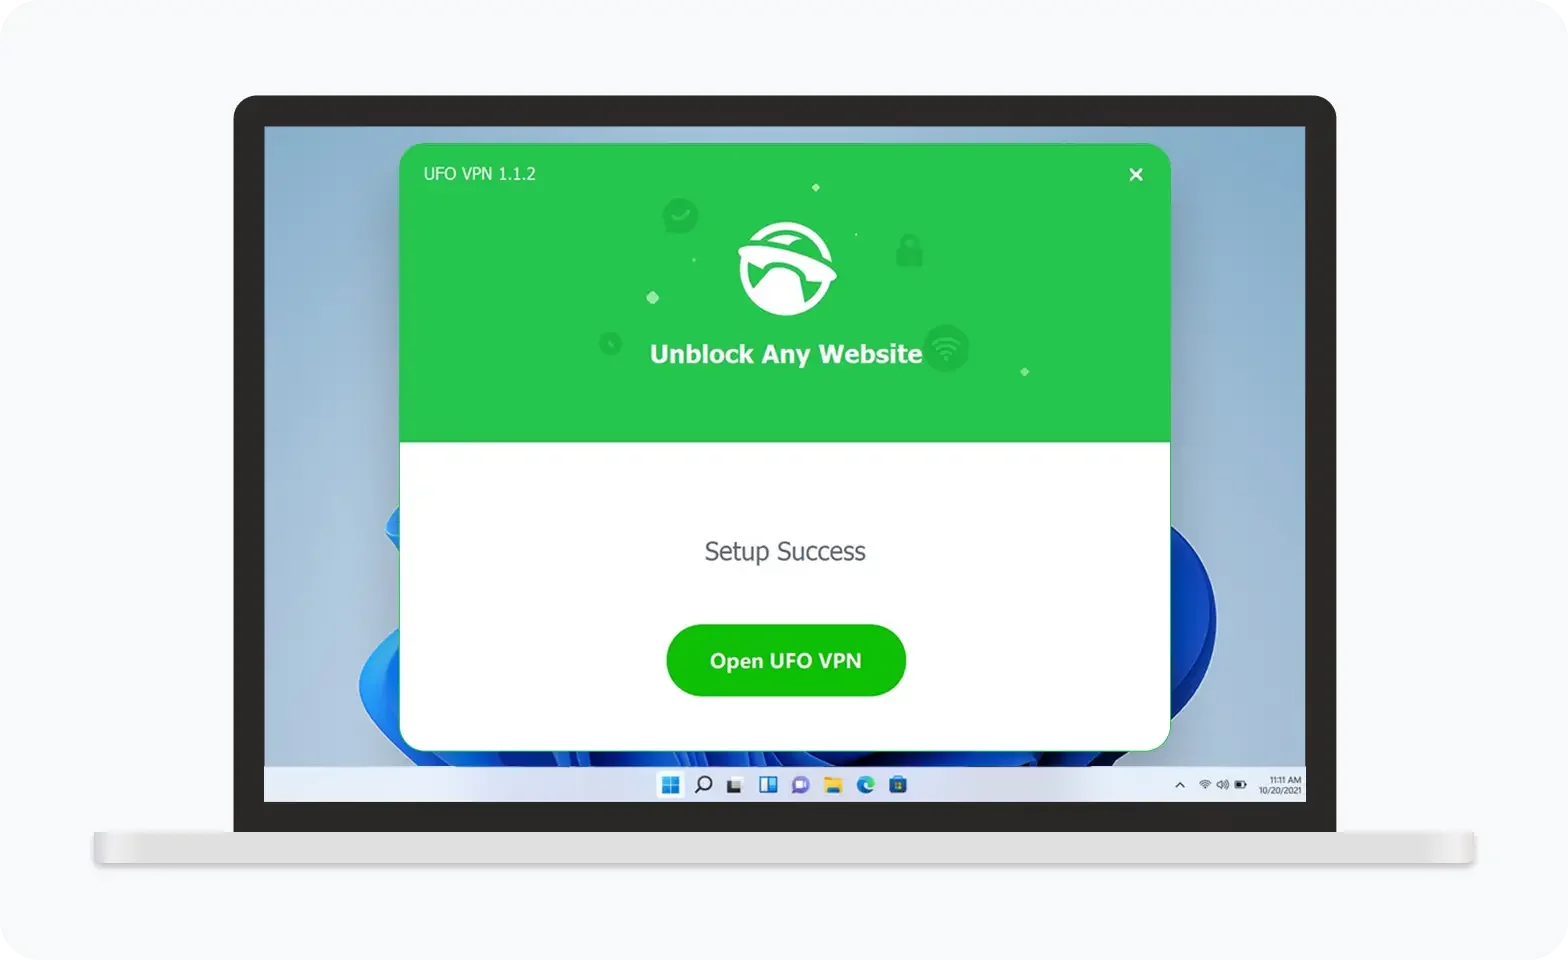 Step 2Select a VPN ServerInside the app, you can click the "Connect" button for quick connection, or browse the list of servers by Location or categroy: Video& Stream, Game, etc. Choosing the right server ensures fast speeds and smooth access.
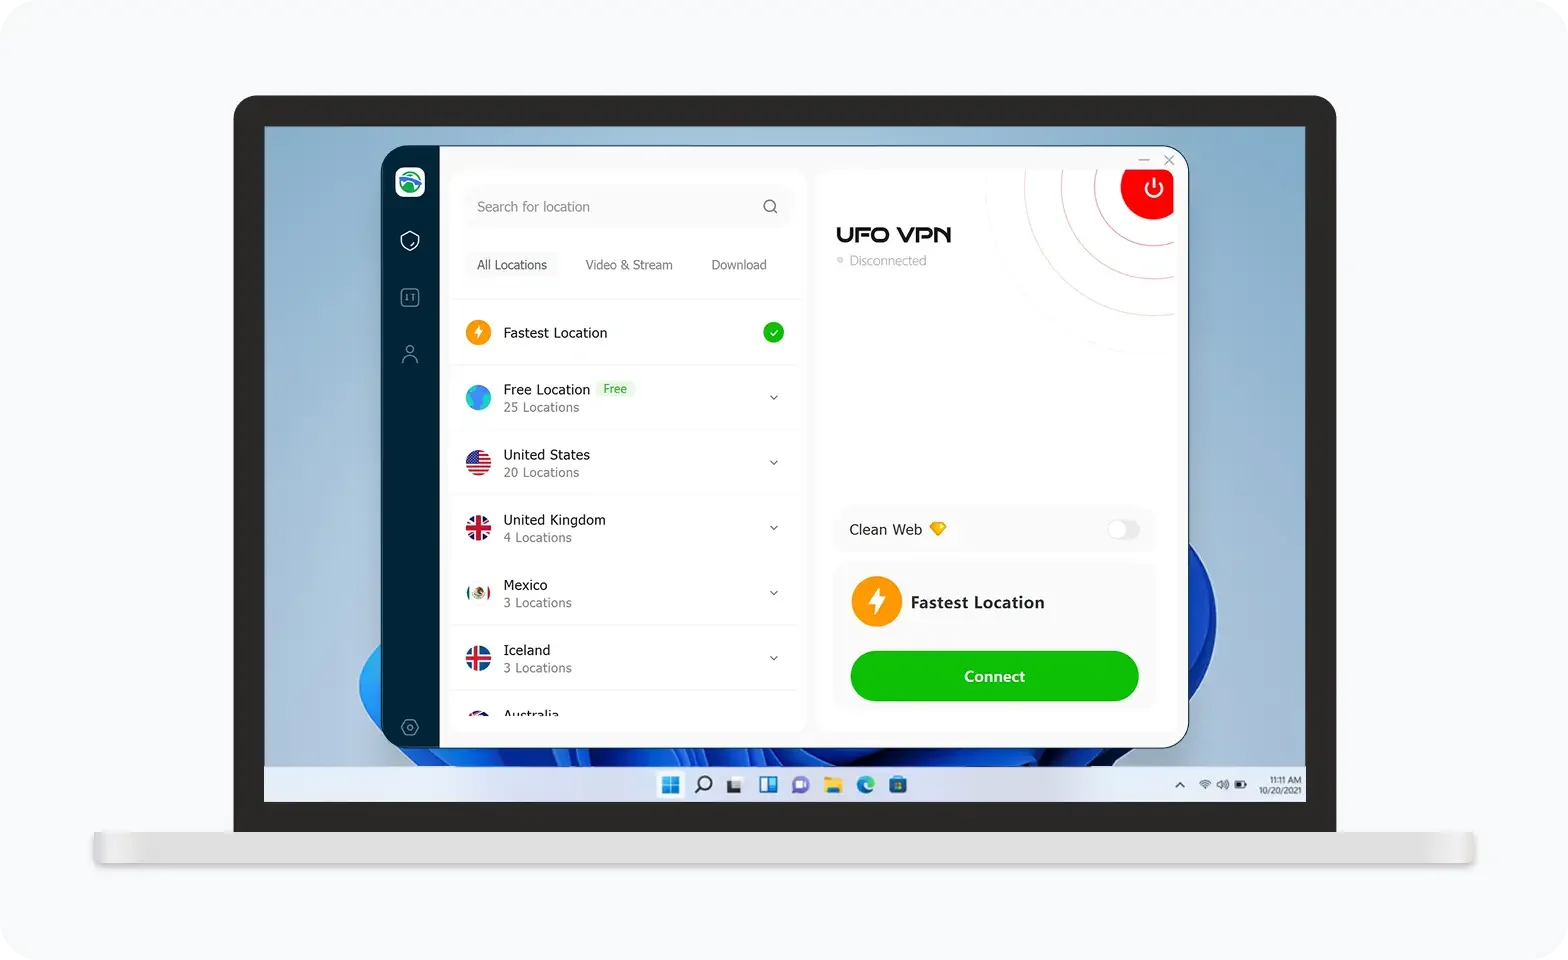
UFO VPN is an all-in-one VPN that offers unlimited access to 4D streaming like Netlfix, Disney Plus, no-ping gaming as PUBG, Roblox, CODM and social networking for YouTube, X, Facebook and more.
Step 3Enable Advanced FeaturesIn addition to basic functions, we recommend you turn on extra protections via Ad Blocker and features like Kill Switch, Split Tunneling and Smart Hop. Users can optimize online gaming/streaming/chatting as much as possible.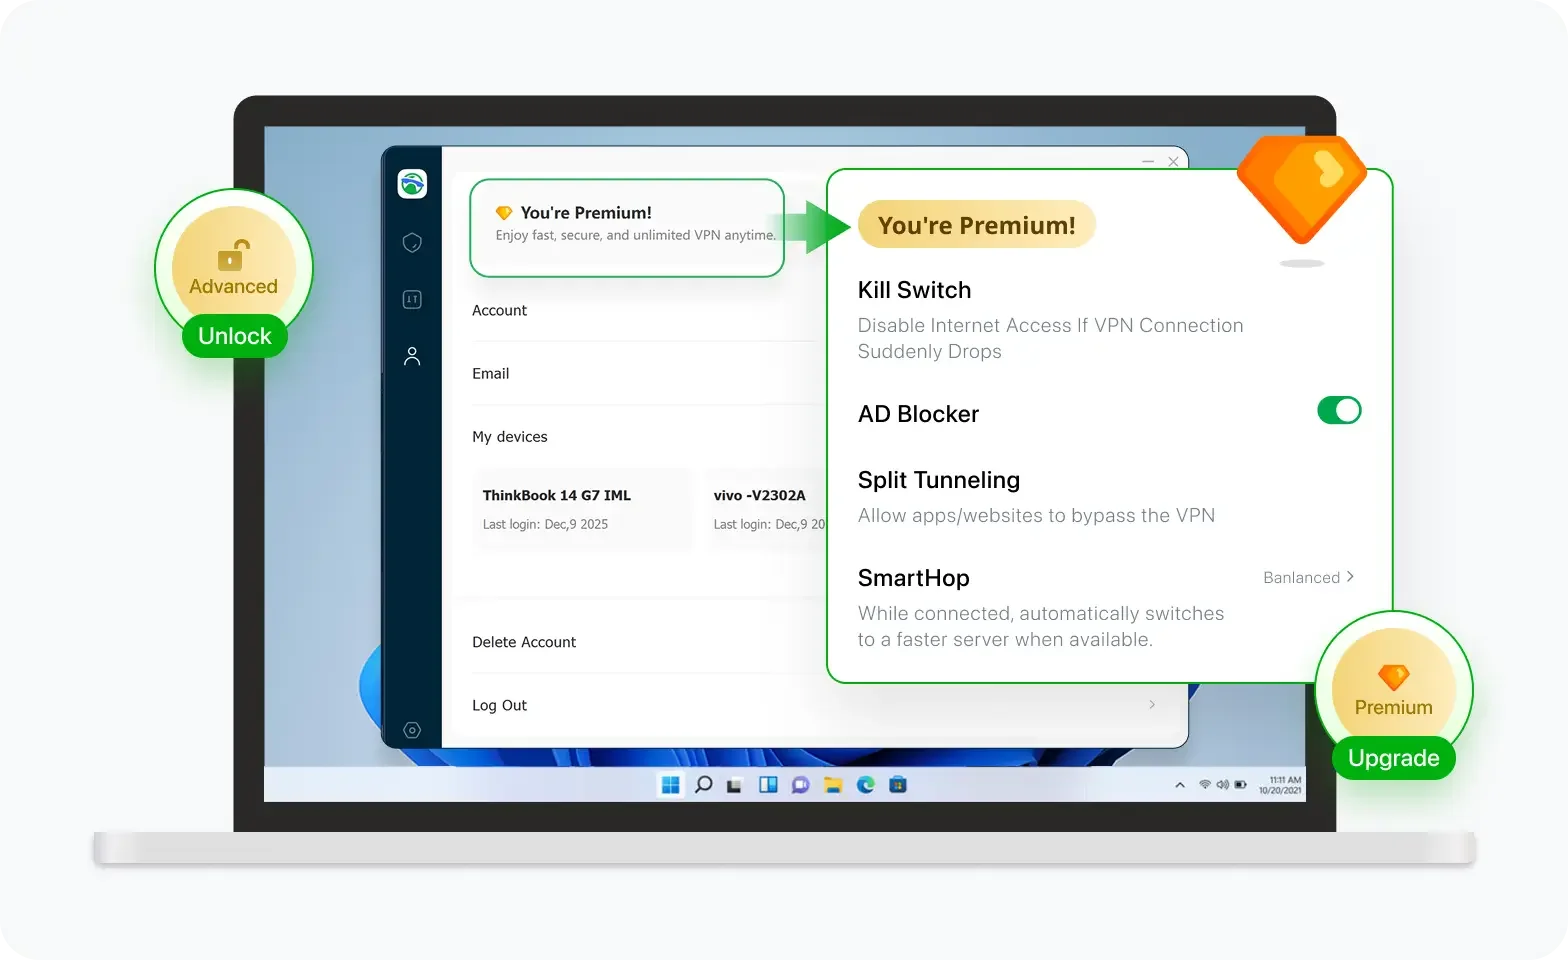 Step 4Check Your New IPUse UFO VPN's built-in " What is My IP" feature to see your new IP address and location. This confirms your VPN is working, hides your real IP, and ensures privacy while browsing.
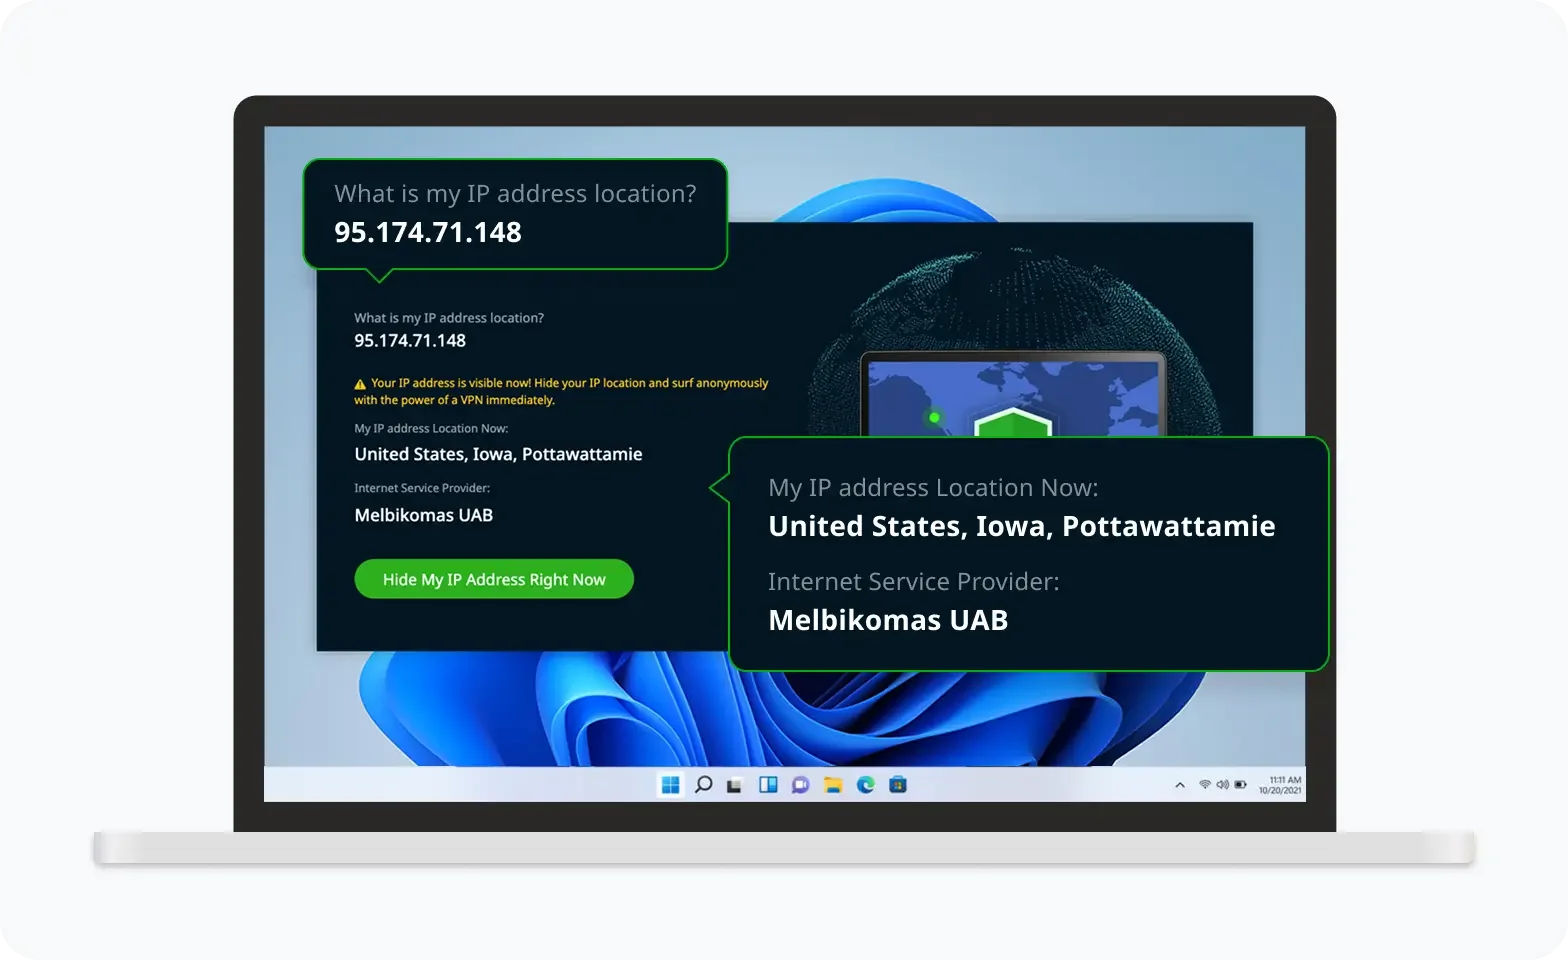 Step 1 Download and install UFO VPN for macOSClick the button below to download offcial Mac VPN free. Open the .dmg file, drag UFO VPN to your Applications folder, and launch it. You're just a few clicks away from secure browsing.
 Step 2 Pick Your IP ServerTap "Connect" button for the fastest server automatically. Or you can select a server from the global server list in 100+ countries. UFO VPN is an UFO VPN is an all-in-one VPN or gaming, video streaming, social platforms, and AI tools.
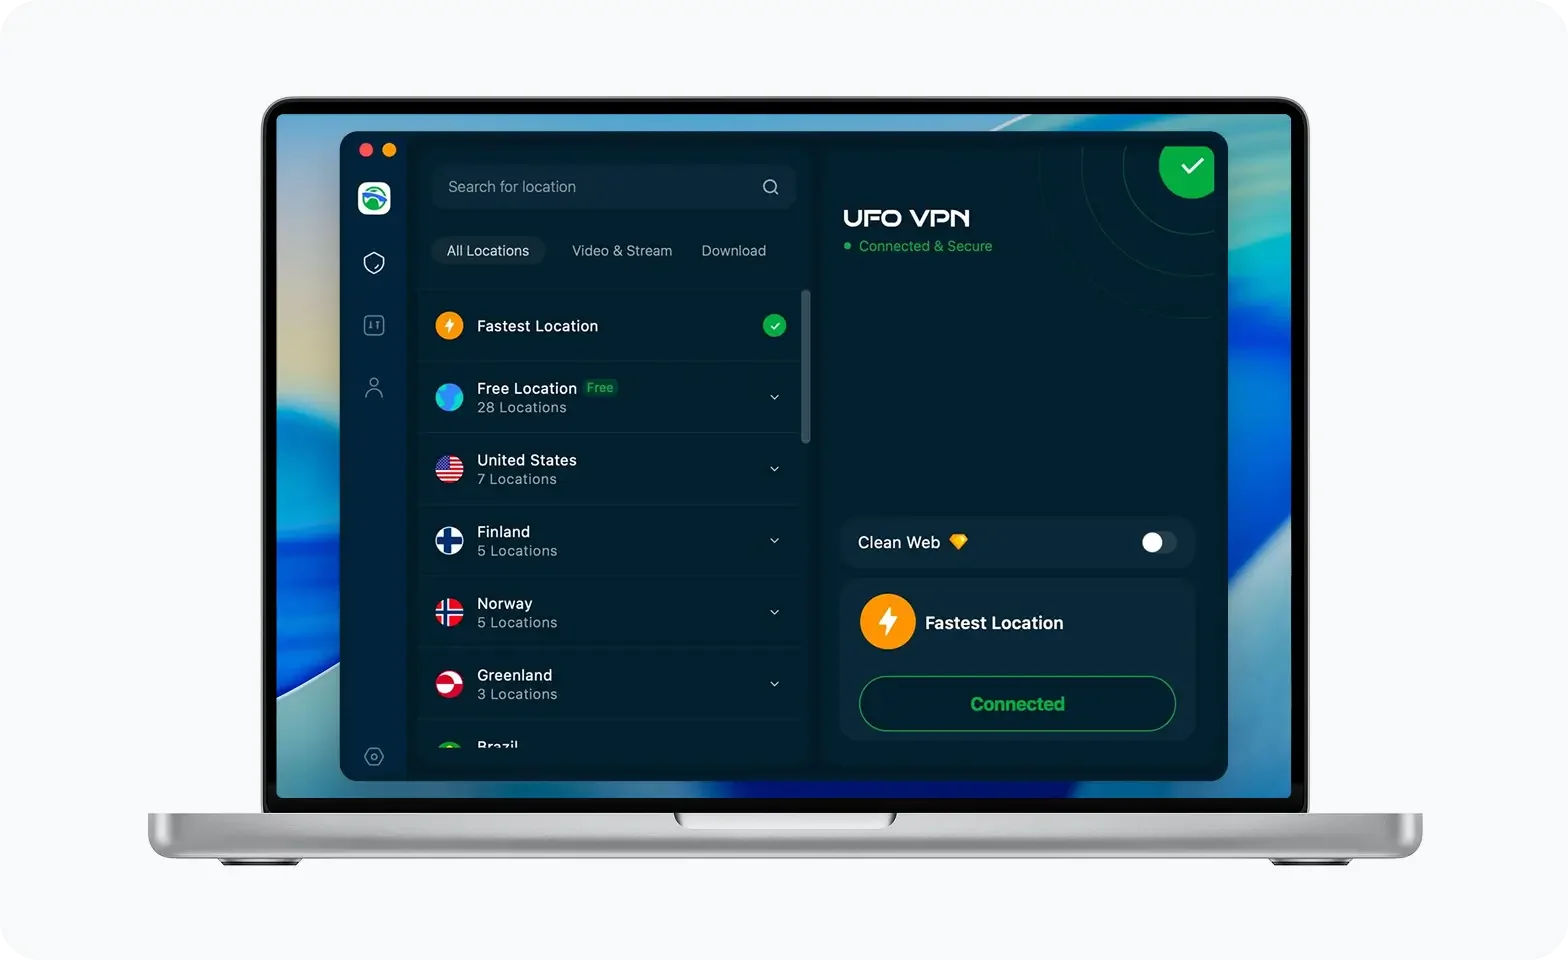 Step 3
Unlock Pro Features
If you have upgraded to premium plan , feel free to enjoy premium servers for 4K streaming and advanced features like Kill Switch, Split Tunneling, and gaming acceleration. Your Mac is now fully optimized and protected. Inaddition to basic functions, we recommend you turn on
 Step 4
Verify Your IP Now
Use UFO VPN's " What is My IP " feature to see your new IP and location. This confirms your connection is secure, anonymous, and ready for safe browsing online anywhere at any time.
 Step 1 Download and install UFO VPN for iPhone/iPadDownload this free iOS VPN via official link or App Store. Once installed, launch the app to get started. UFO VPN is now trusted by over 2 million users worldwide with optimzed service.
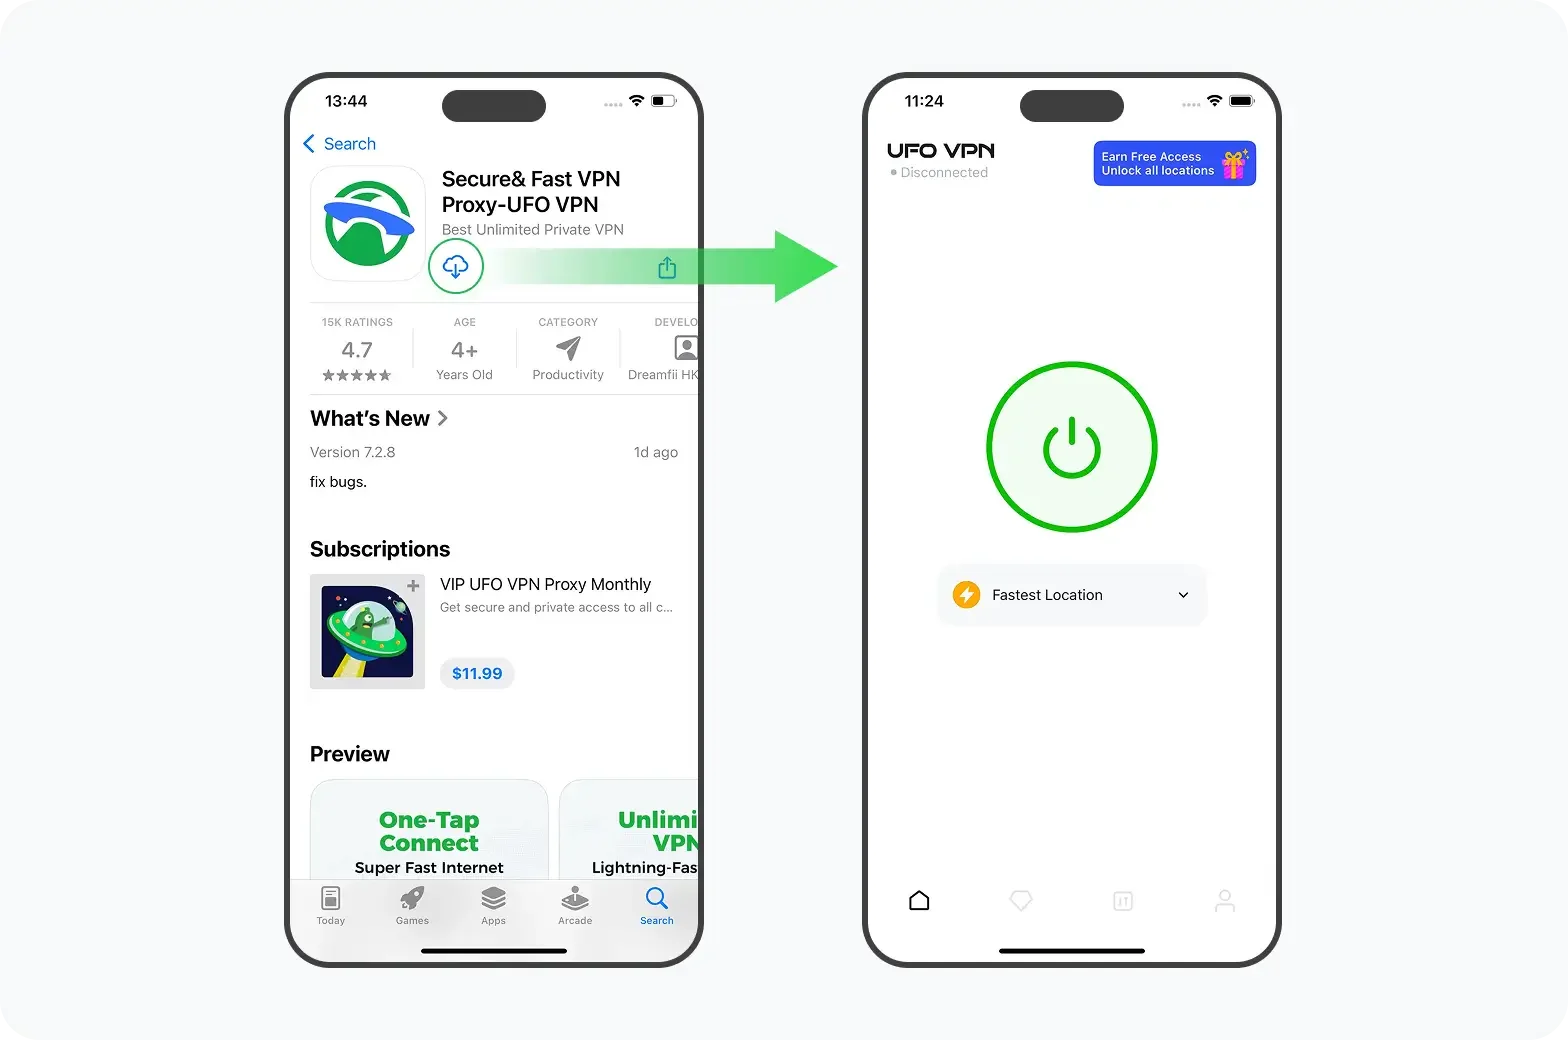 Step 2 Select a Perfect ServerHit "Connect" button for the fastest server near you instantly. Or you can choose a favorite location/platform from the server list manually for full control. UFO VPN is an all-in-one VPN companion for gaming, streaming, social media, and AI tools.
 Step 3 Lookup IP and Enable Pro FeaturesNow you can check your current IP via built-in IP lookup tool. Pro features in premium plan offer you premium servers, blazing speeds, Kill Switch, Split Tunneling, and Multi-device login, so you can protect your iPhone, iPad, and other Apple devices all at once.
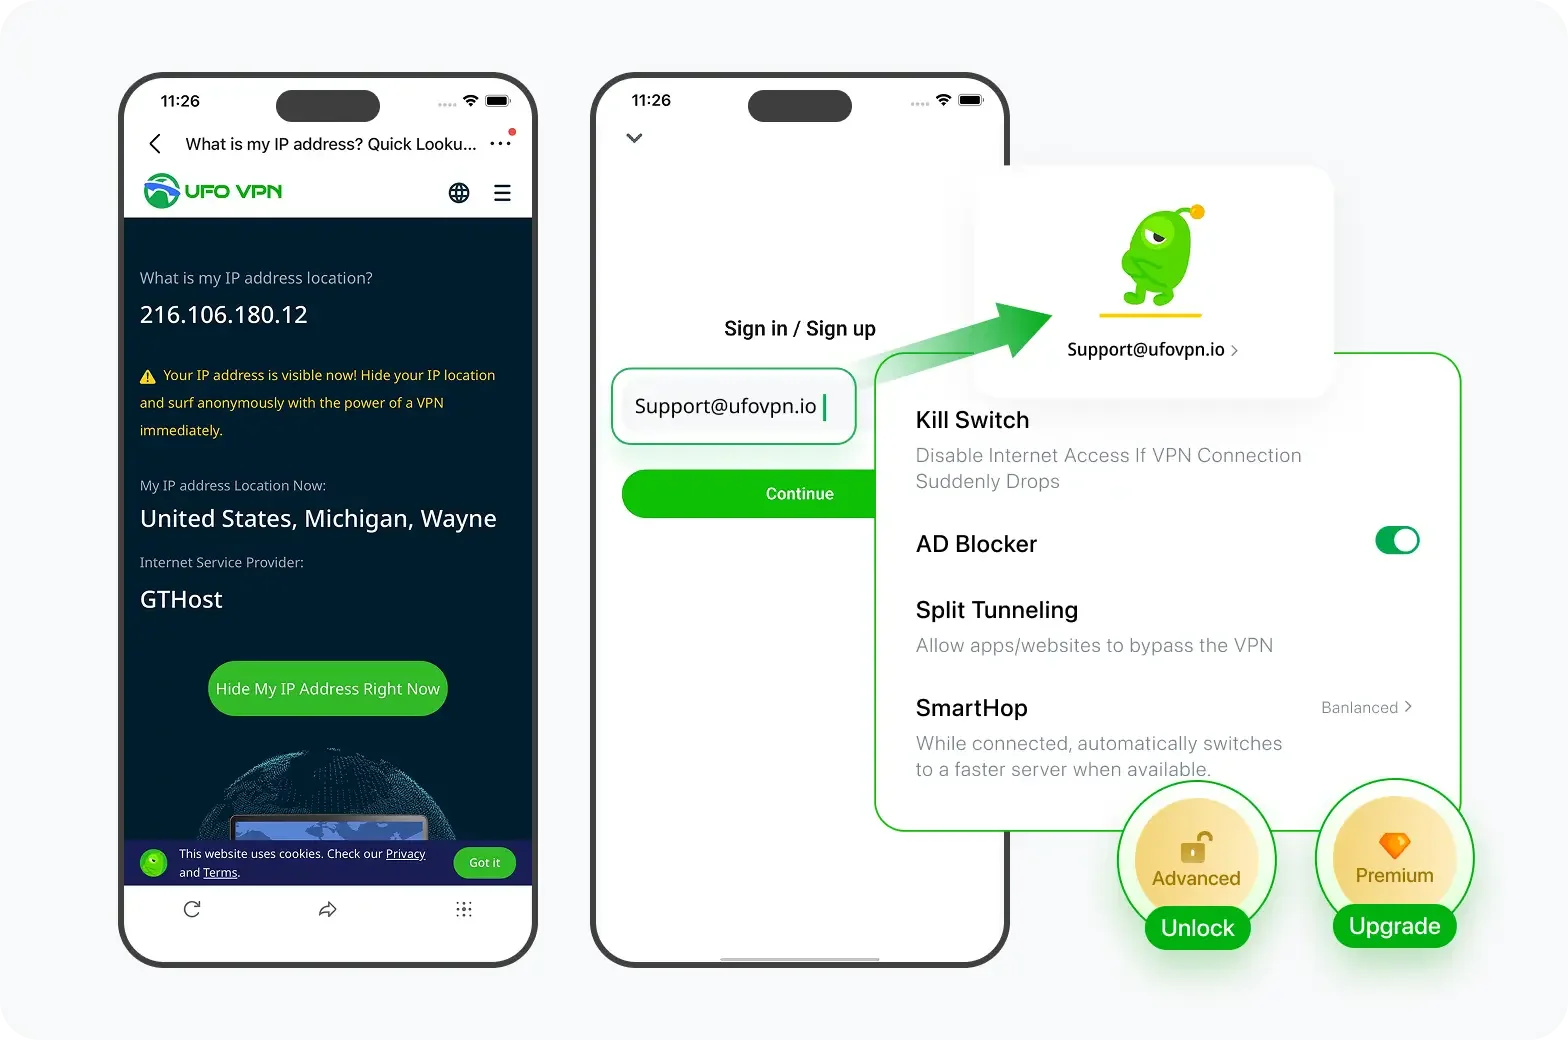 Step 1 install UFO VPN for AndroidGet free Android VPN from offcial website or Google Play Store. Follow the instructions for easy download. Then open the app and get ready to surf safely.
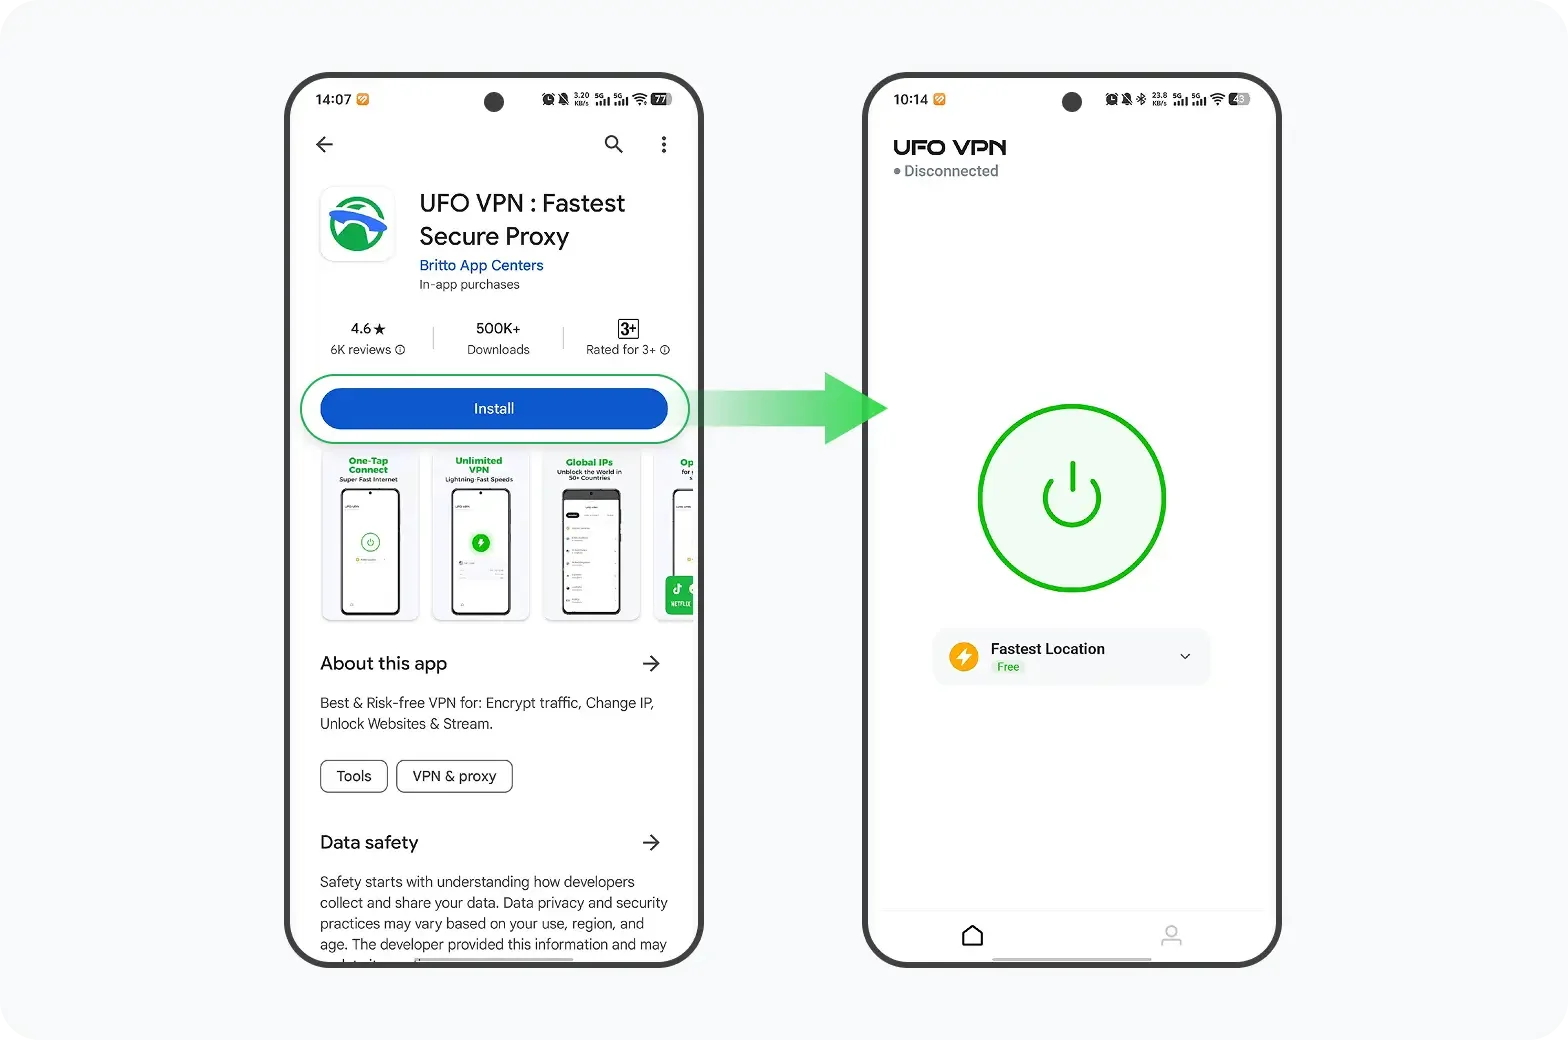 Step 2 Choose Your Ideal ServerUFO VPN is an all-in-one powerhouse for gaming, video streaming, social apps, and AI tools. The"Connect" button links you to the fastest server instantly, or you can choose among the server list manually via Location/ Video&Stream/Games for easy access.
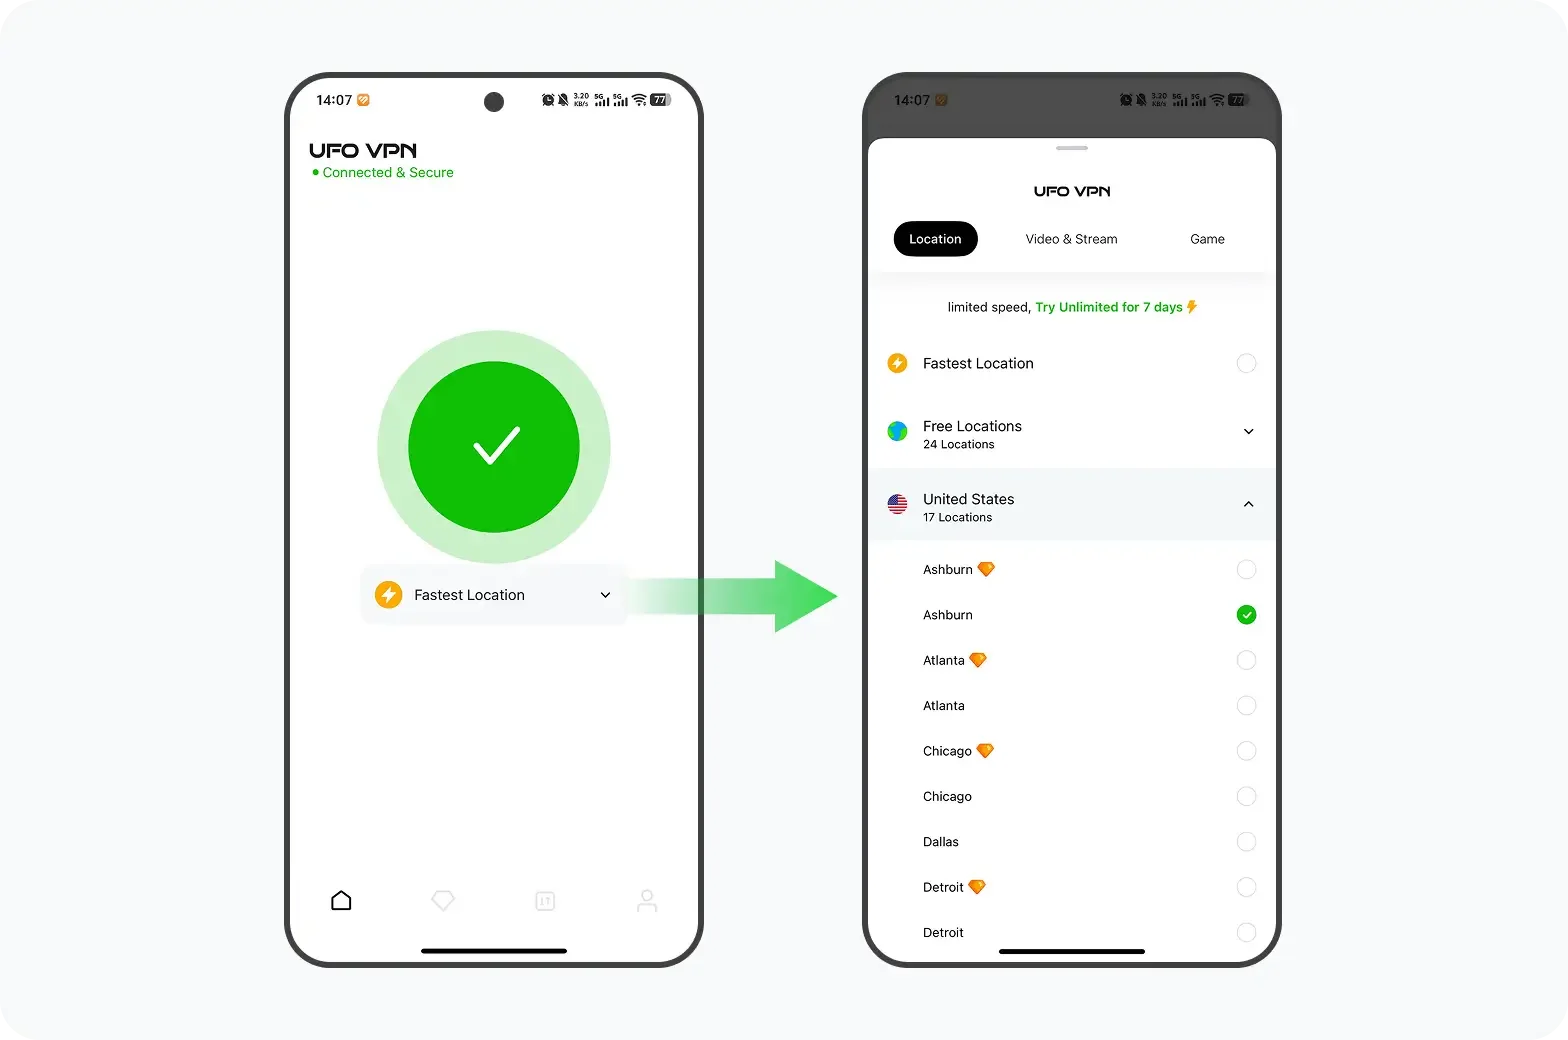 Step 3 Power Up Pro FeaturesPro users can look up current IP via built-in "What Is My IP" feature, and unlock premium features like 4K servers, turbo speeds, Kill Switch, Split Tunneling, and Multi-device login, keeping all your Android phones, tablets, and other devices safe at once.
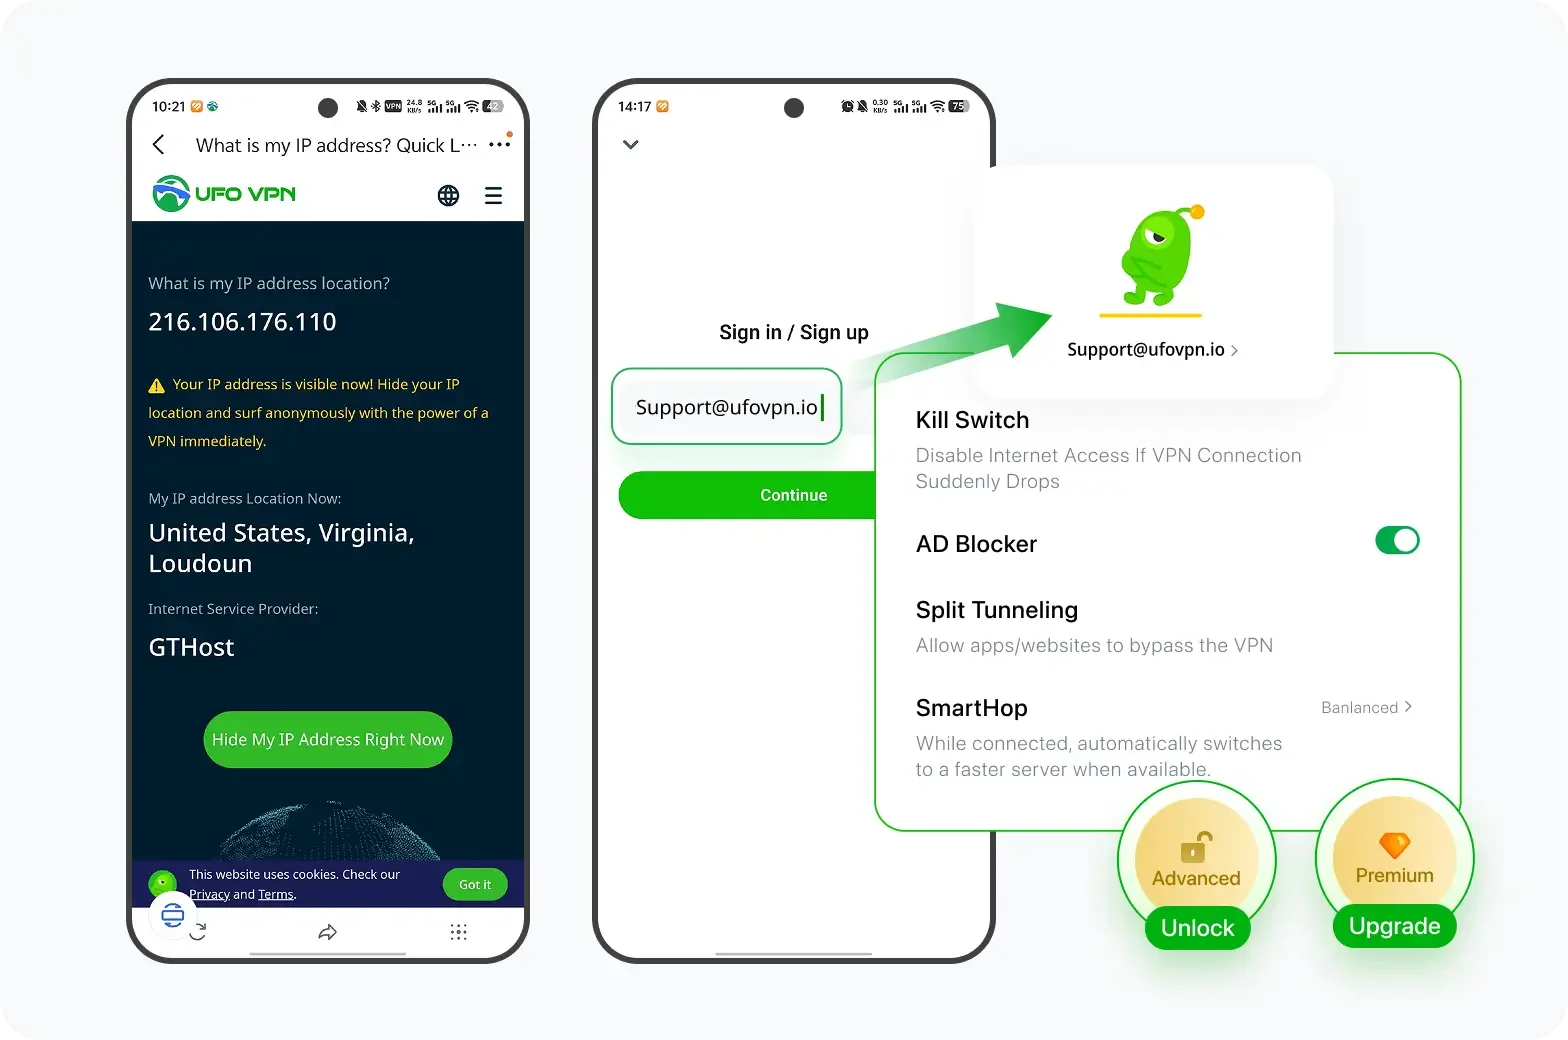
-
Launch PicoTorrent:
-
Always connect UFO VPN first, then start PicoTorrent.
-
Optionally, use Windows Firewall to allow PicoTorrent traffic only on the VPN network adapter.
-
2. Optimize Connection Settings
-
Bandwidth Allocation:
-
In Preferences → Connections, allocate 80% of your real upload rate; leave 20% free for other apps.
-
-
Peer Limits:
-
Set Global max connections to 200–300, Per-torrent max to 50–80 for balanced speed without choking your router.
-
3. Use IP Filter Lists
-
Download a trusted IP blocklist (e.g., from iBlockList).
-
In Preferences → Advanced, enable IP Filter and point to the list file.
-
Reload lists periodically to block malicious peers.
4. Schedule Downloads
-
If your network is busy during the day, use Windows Task Scheduler to run PicoTorrent at night (via command line argument).
-
Alternatively, manually pause and resume torrents.
FAQs
Q1: Can I run PicoTorrent portable?
A1: Yes. Download the portable zip, extract it, ensure Visual C++ 2019 runtime is installed, then run PicoTorrent.exe. No installer needed.
Q2: Will a VPN slow down my PicoTorrent downloads?
A2: Some overhead is normal. Use a nearby P2P-friendly server and a fast protocol (WireGuard) to minimize speed loss.
Q3: How often should I update PicoTorrent?
A3: Check for updates periodically on the official site or GitHub. New versions may include performance improvements and security fixes.
Q4: Can I use IP filter lists with PicoTorrent?
A4: Yes. Download blocklists (e.g., from iBlockList), then enable IP Filter in Preferences → Advanced and import the list file.
Q5: What if my ISP still throttles torrent traffic with VPN?
A5: Try changing VPN protocol (e.g., from WireGuard to OpenVPN UDP/TCP) or switch to a different P2P server. Ensure kill-switch is active.
Q6: How do I uninstall PicoTorrent?
A6: If installed, go to Settings → Apps, find PicoTorrent, and Uninstall. For portable, simply delete the extracted folder and clear any config in %AppData%\PicoTorrent.