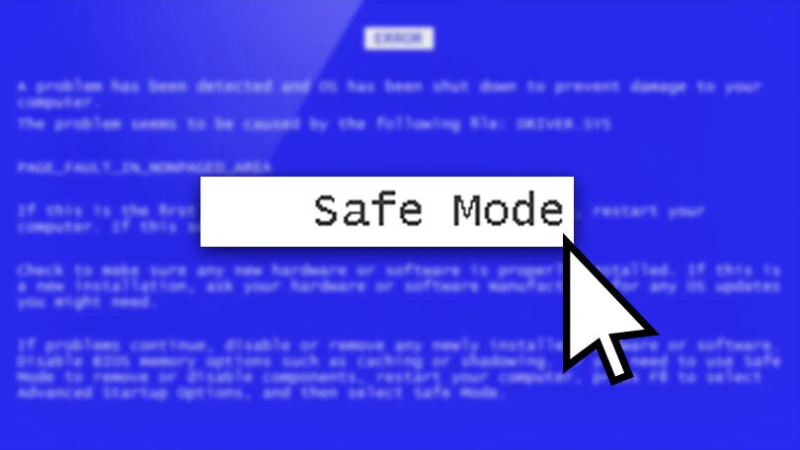
What Is Safe Mode?
Safe Mode is a diagnostic boot option that temporarily disables all third‑party applications, widgets, and non‑critical services. When enabled, your phone:
-
Loads only core system apps (Phone, Messages, Settings) and essential drivers.
-
Prevents user‑installed apps from launching at startup, isolating their impact on performance.
-
Disables background services and overlays such as custom launchers or system mods .
This environment is invaluable because it lets you determine whether erratic behavior—crashes, freezes, excessive battery drain—stems from the operating system itself or from an installed app.
Why Is Safe Mode Important?
-
Rapid Troubleshooting: Narrow down problems quickly by seeing if they persist without third‑party code.
-
Malware Removal: Some malicious apps can’t run in Safe Mode, making them easier to uninstall.
-
Stability Verification: Confirms whether system updates or firmware issues cause instability.
-
Resource Conservation: Running only essential services can extend battery life temporarily, letting you complete important tasks.
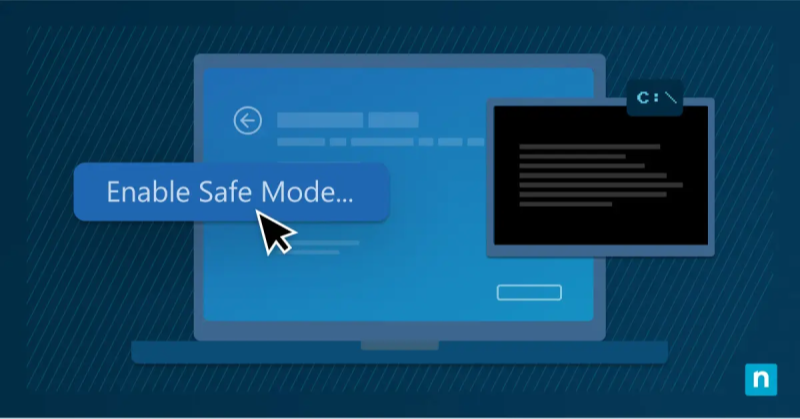
Activating Safe Mode on Android Devices
Android’s Safe Mode entry method varies slightly by manufacturer and Android version. Below are detailed instructions for the most common brands:
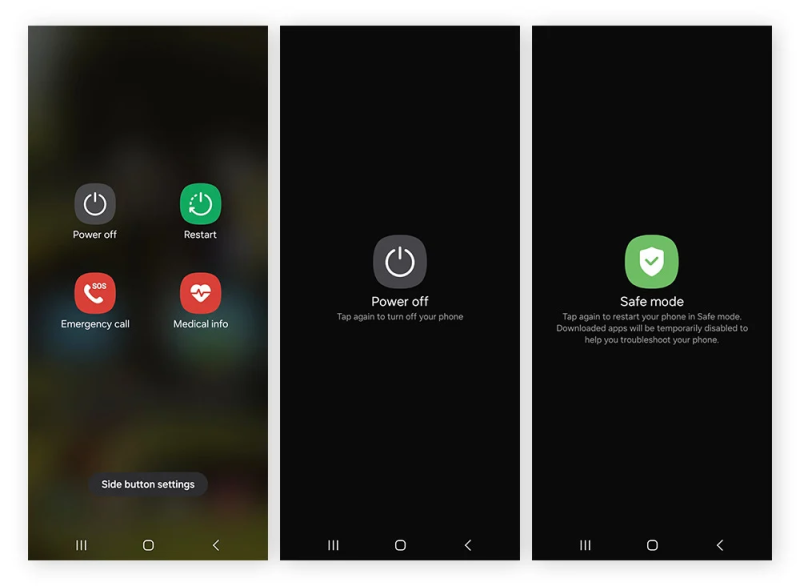
General Method (Most Android 9.0+)
-
Press and Hold Power Button until the power menu appears.
-
Long‑Press “Power Off” on the screen. A prompt to Reboot to safe mode will appear.
-
Tap OK. Your phone will restart in Safe Mode (look for “Safe mode” watermark at the bottom corner).
Samsung (One UI)
-
After tapping Power Off, also hold Volume Down and confirm Safe Mode when prompted.
-
Alternatively, power off completely, then power on while holding Volume Down until Safe Mode appears.
Google Pixel
-
Power off, then power on while holding Volume Down until you see the bootloader menu.
-
Press Volume Down to highlight Safe mode, then press Power to select.
OnePlus (OxygenOS)
-
Long‑press Power Off in the shutdown menu, then tap OK to boot into Safe Mode.
Xiaomi (MIUI)
-
Press Power Off, then tap Reboot to safe mode.
-
If that option is missing, power off → power on + hold Volume Down until you boot into Safe Mode.
Huawei / Honor
-
Power menu → Shut down → long‑press the shutdown icon → choose Safe Mode.
Tip: On some devices, you may need to hold Power + Volume Down simultaneously for 10–15 seconds during boot to force Safe Mode.
Activating Safe Mode on iOS (Jailbroken Devices)
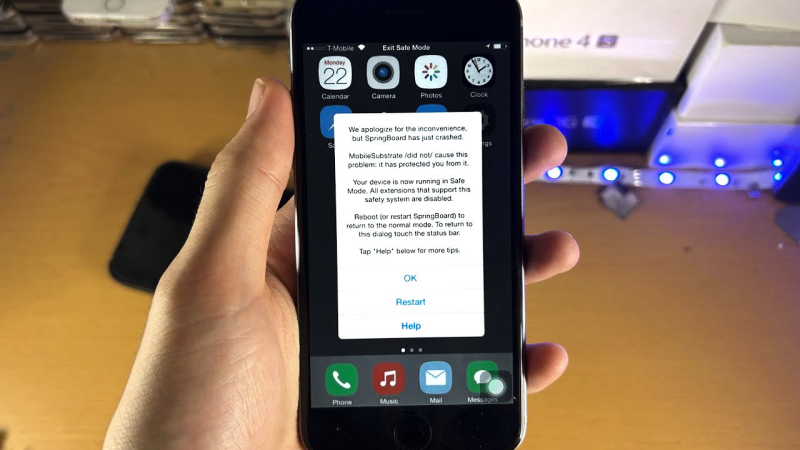
Apple does not provide Safe Mode on stock iPhones. However, on jailbroken devices using tweaks like Cydia Substrate or libhooker, Safe Mode halts all jailbreak tweaks:
-
Using Crash: Many jailbreak tweaks automatically trigger Safe Mode if a tweak crashes at boot.
-
Manual Toggle: Open your jailbreak app (e.g., Cydia), and tap Safe Mode under the settings or use a terminal command:
-
Control Center Toggle: Some tweak suites add a Safe Mode switch directly to Control Center.
How to Turn Off Safe Mode
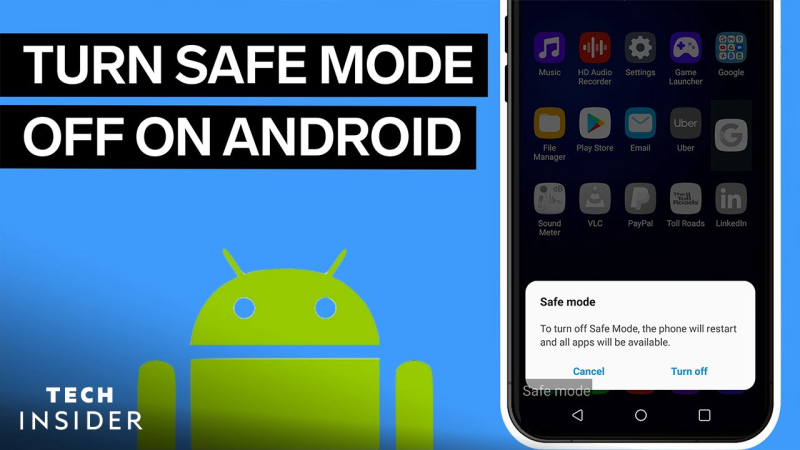
On Android Devices
-
Simple Restart: Press and hold Power → Restart (or power off, then power on normally).
-
Notification Panel: On some skins, swipe down and tap the Safe mode is on banner to reboot.
-
Hardware Reset: If the above fail, power off, then power on without pressing volume keys.
If your phone automatically reboots into Safe Mode, check for:
-
Stuck Volume Key: Inspect and clean the volume rocker for debris.
-
Faulty Power/Volume Buttons: Hardware failure may require professional repair.
On iOS (Jailbroken)
-
Reboot: Hold Power + Home (or Power + Volume Down) until the Apple logo appears.
-
Cydia Exit: In Cydia, disable Safe Mode via the tweak’s settings or uninstall the offending tweak.
Preventive Practices
When troubleshooting—especially over public networks—you expose system logs, device identifiers, and potentially sensitive diagnostic reports. Protect your session with these practices:
-
Use a VPN for Secure Diagnostics
-
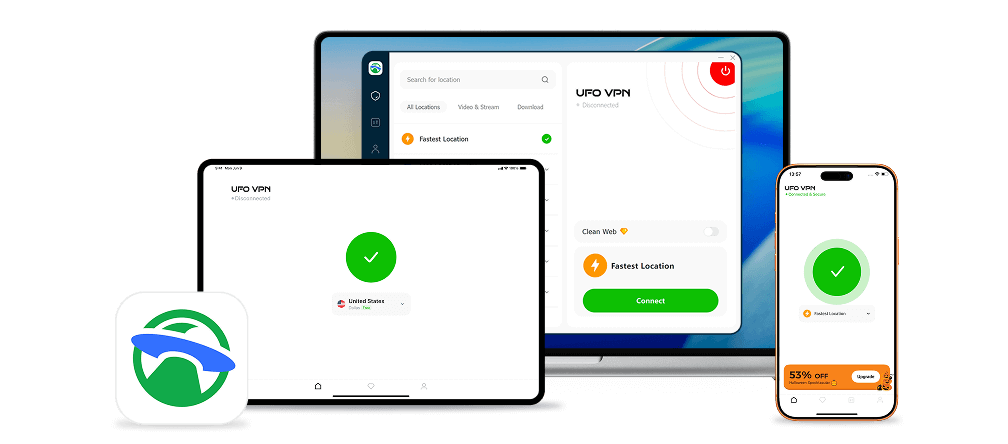
A VPN such as UFO VPN: a free proxy VPN encrypts all data between your device and the internet, preventing eavesdropping when downloading firmware updates, diagnostic apps, or remote admin tools.
-
Download UFO VPN:
Step 1Download UFO VPN for WindowsGrab the free Windows VPN installer right below. UFO VPN is lightweight and secure on all Windows systems. Double-click the downloaded file and complete the installation. Once installed, launch UFO VPN.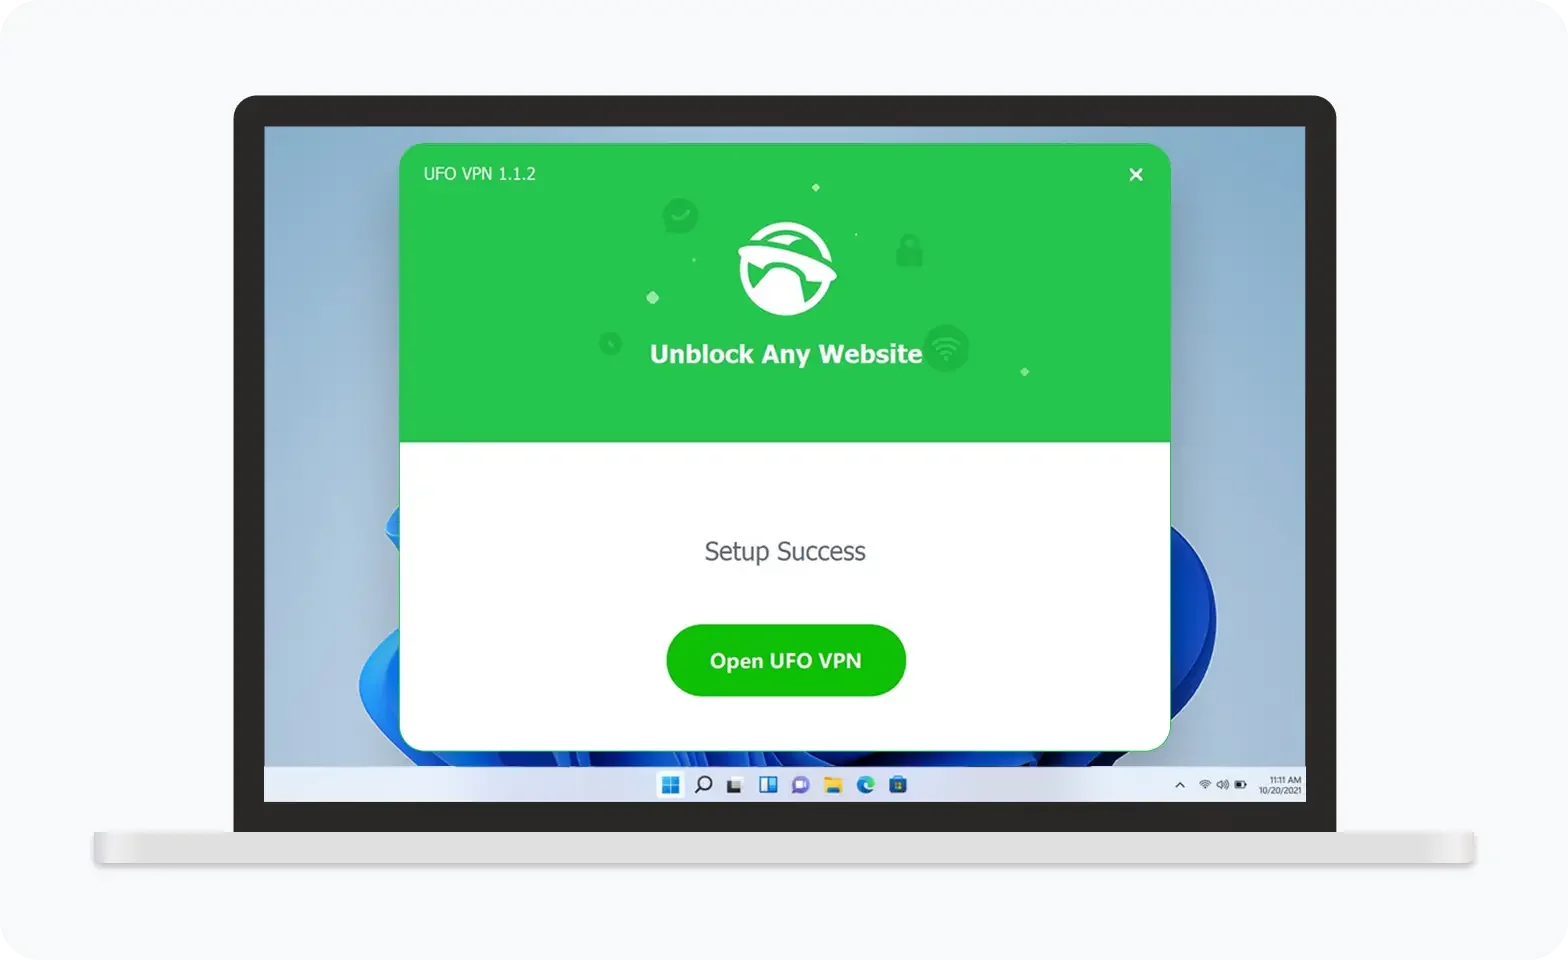 Step 2Select a VPN ServerInside the app, you can click the "Connect" button for quick connection, or browse the list of servers by Location or categroy: Video& Stream, Game, etc. Choosing the right server ensures fast speeds and smooth access.
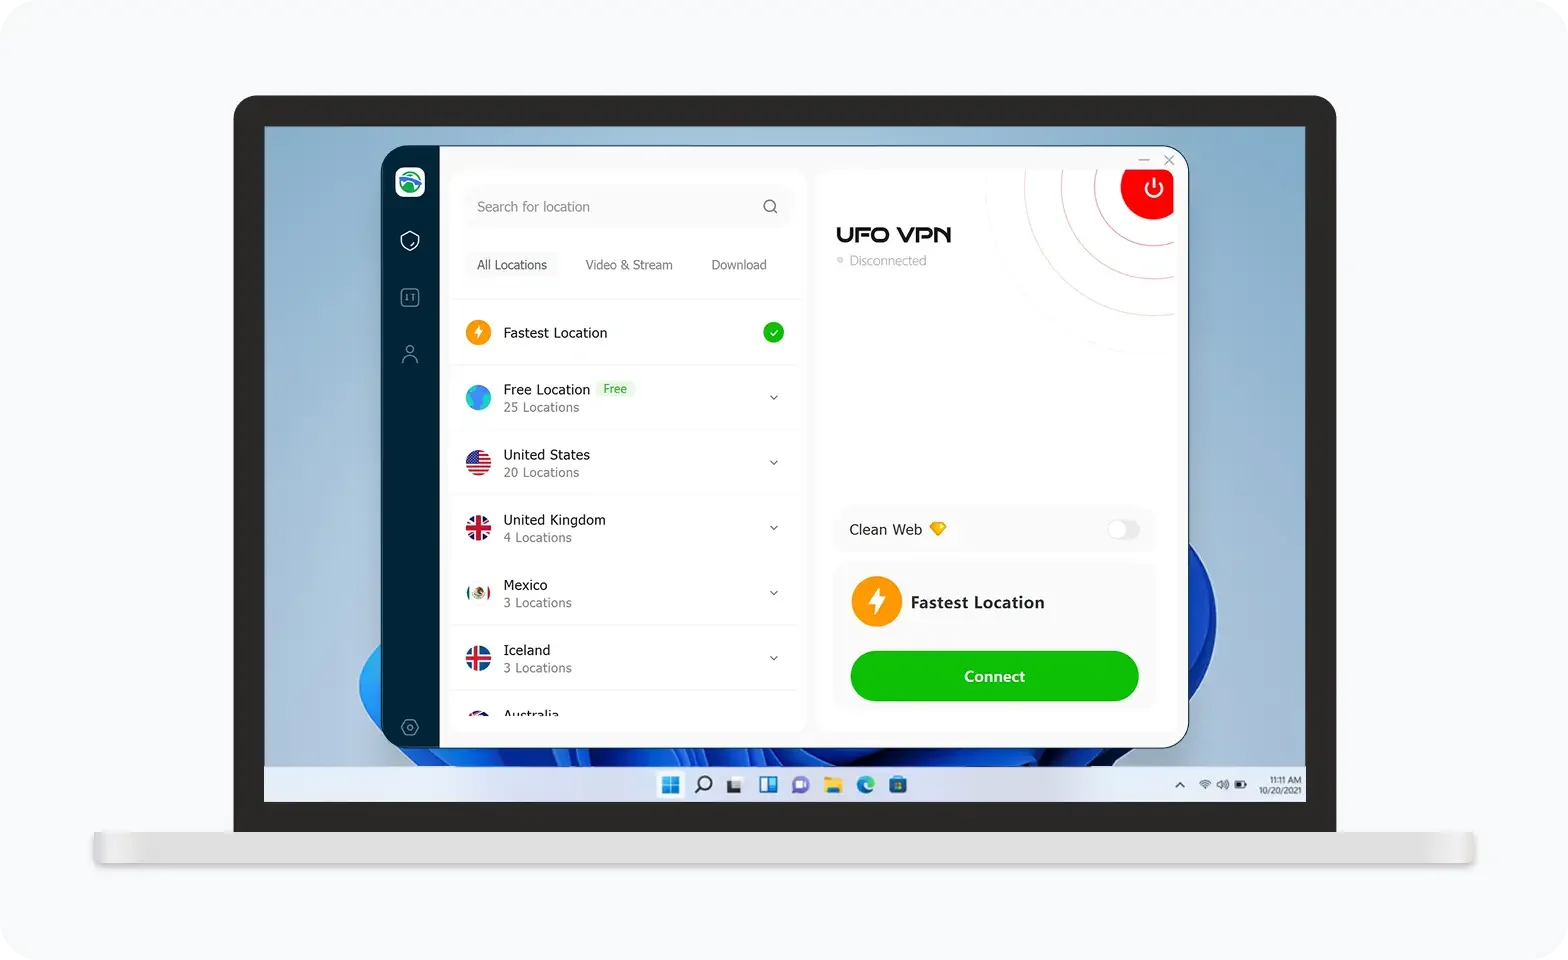
UFO VPN is an all-in-one VPN that offers unlimited access to 4D streaming like Netlfix, Disney Plus, no-ping gaming as PUBG, Roblox, CODM and social networking for YouTube, X, Facebook and more.
Step 3Enable Advanced FeaturesIn addition to basic functions, we recommend you turn on extra protections via Ad Blocker and features like Kill Switch, Split Tunneling and Smart Hop. Users can optimize online gaming/streaming/chatting as much as possible.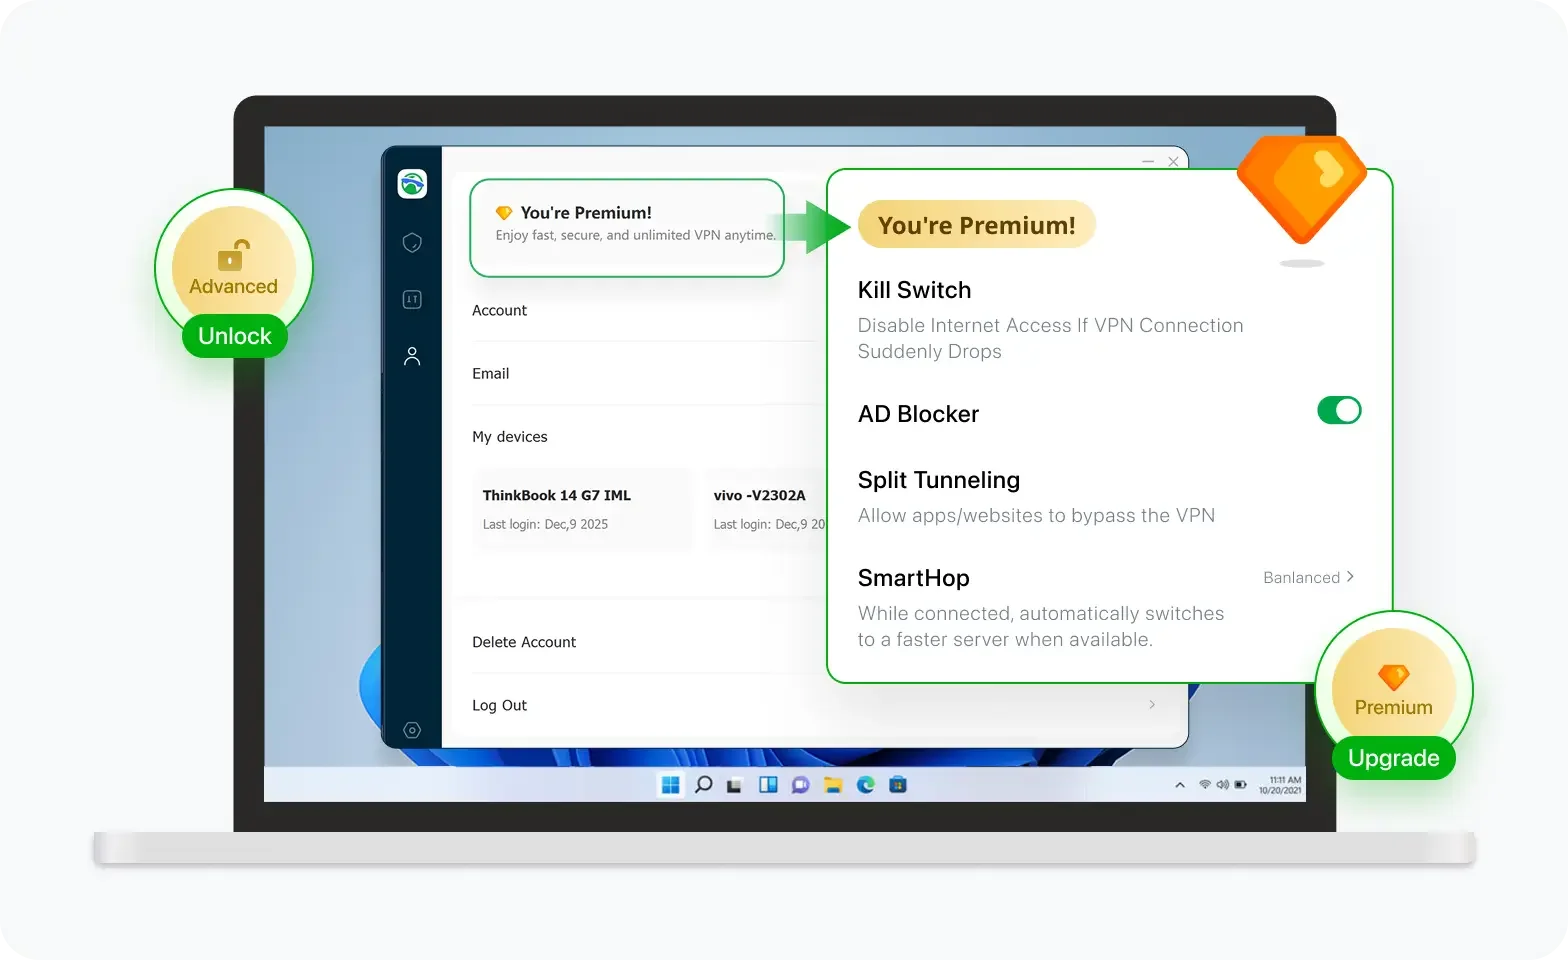 Step 4Check Your New IPUse UFO VPN's built-in " What is My IP" feature to see your new IP address and location. This confirms your VPN is working, hides your real IP, and ensures privacy while browsing.
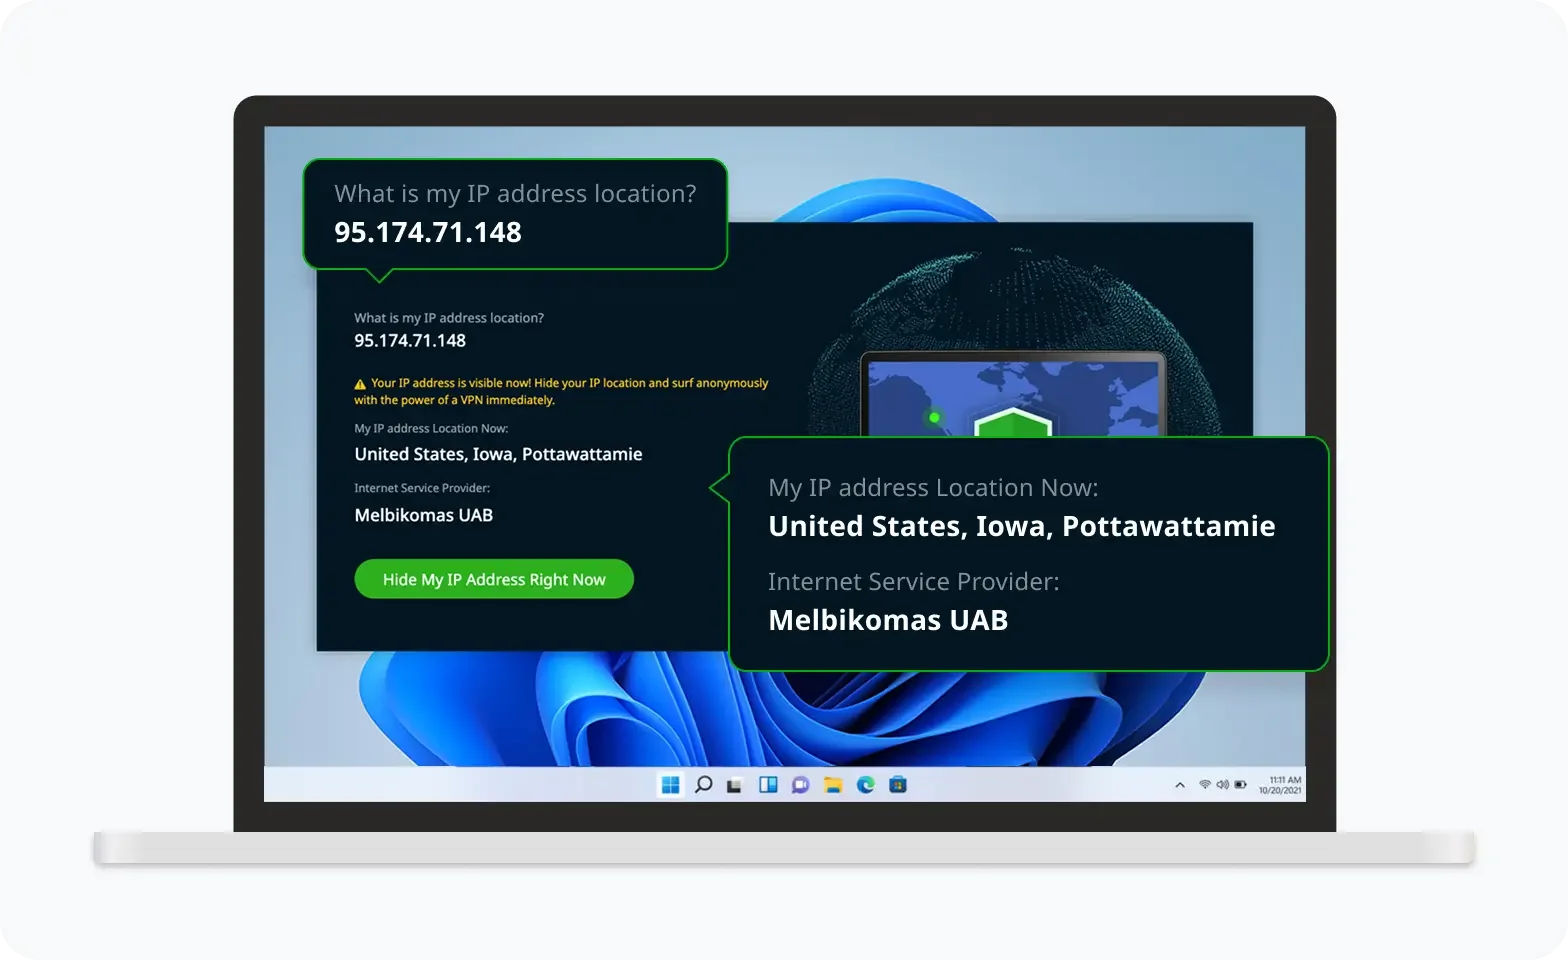 Step 1 Download and install UFO VPN for macOSClick the button below to download offcial Mac VPN free. Open the .dmg file, drag UFO VPN to your Applications folder, and launch it. You're just a few clicks away from secure browsing.
 Step 2 Pick Your IP ServerTap "Connect" button for the fastest server automatically. Or you can select a server from the global server list in 100+ countries. UFO VPN is an UFO VPN is an all-in-one VPN or gaming, video streaming, social platforms, and AI tools.
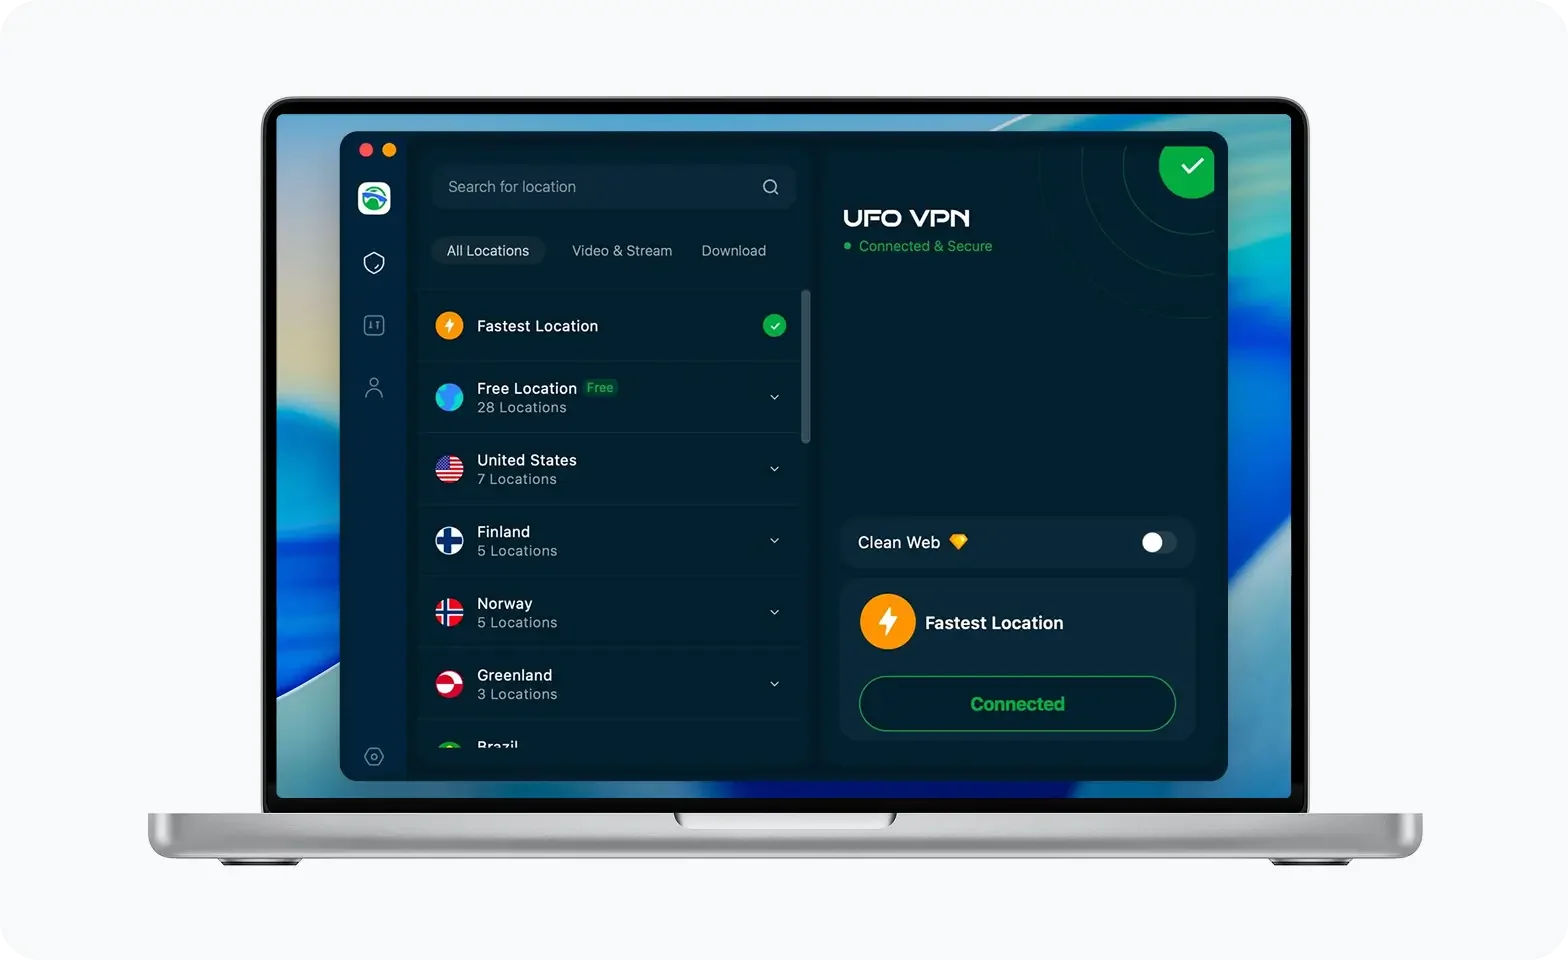 Step 3
Unlock Pro Features
If you have upgraded to premium plan , feel free to enjoy premium servers for 4K streaming and advanced features like Kill Switch, Split Tunneling, and gaming acceleration. Your Mac is now fully optimized and protected. Inaddition to basic functions, we recommend you turn on
 Step 4
Verify Your IP Now
Use UFO VPN's " What is My IP " feature to see your new IP and location. This confirms your connection is secure, anonymous, and ready for safe browsing online anywhere at any time.
 Step 1 Download and install UFO VPN for iPhone/iPadDownload this free iOS VPN via official link or App Store. Once installed, launch the app to get started. UFO VPN is now trusted by over 2 million users worldwide with optimzed service.
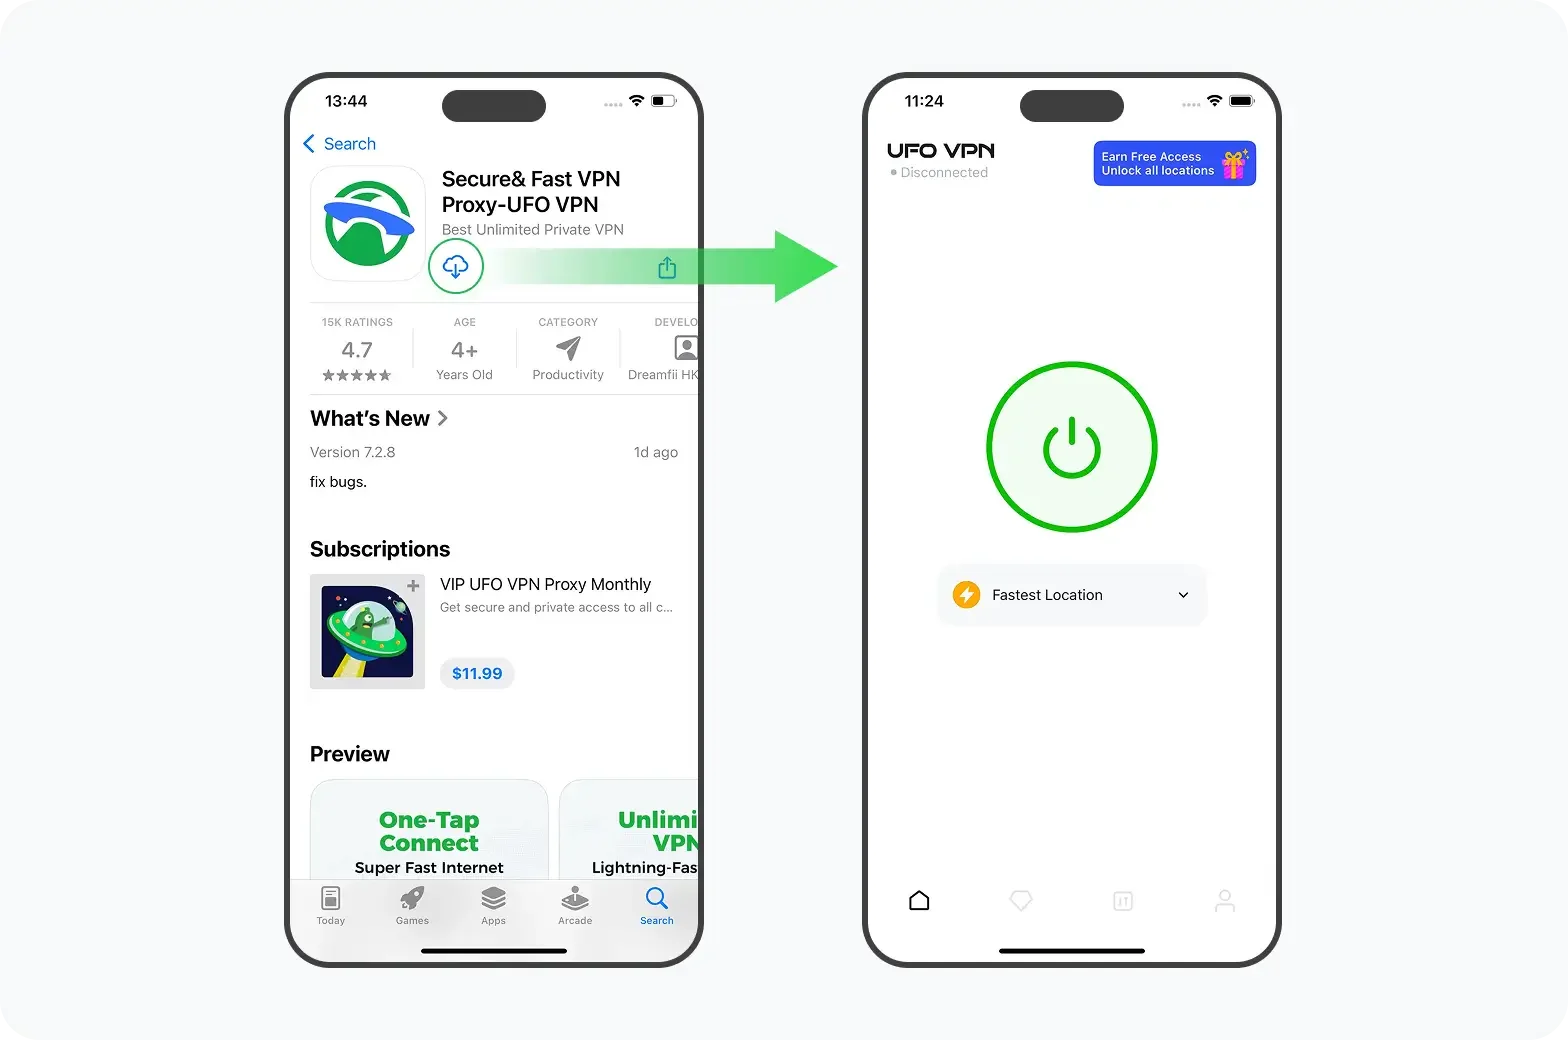 Step 2 Select a Perfect ServerHit "Connect" button for the fastest server near you instantly. Or you can choose a favorite location/platform from the server list manually for full control. UFO VPN is an all-in-one VPN companion for gaming, streaming, social media, and AI tools.
 Step 3 Lookup IP and Enable Pro FeaturesNow you can check your current IP via built-in IP lookup tool. Pro features in premium plan offer you premium servers, blazing speeds, Kill Switch, Split Tunneling, and Multi-device login, so you can protect your iPhone, iPad, and other Apple devices all at once.
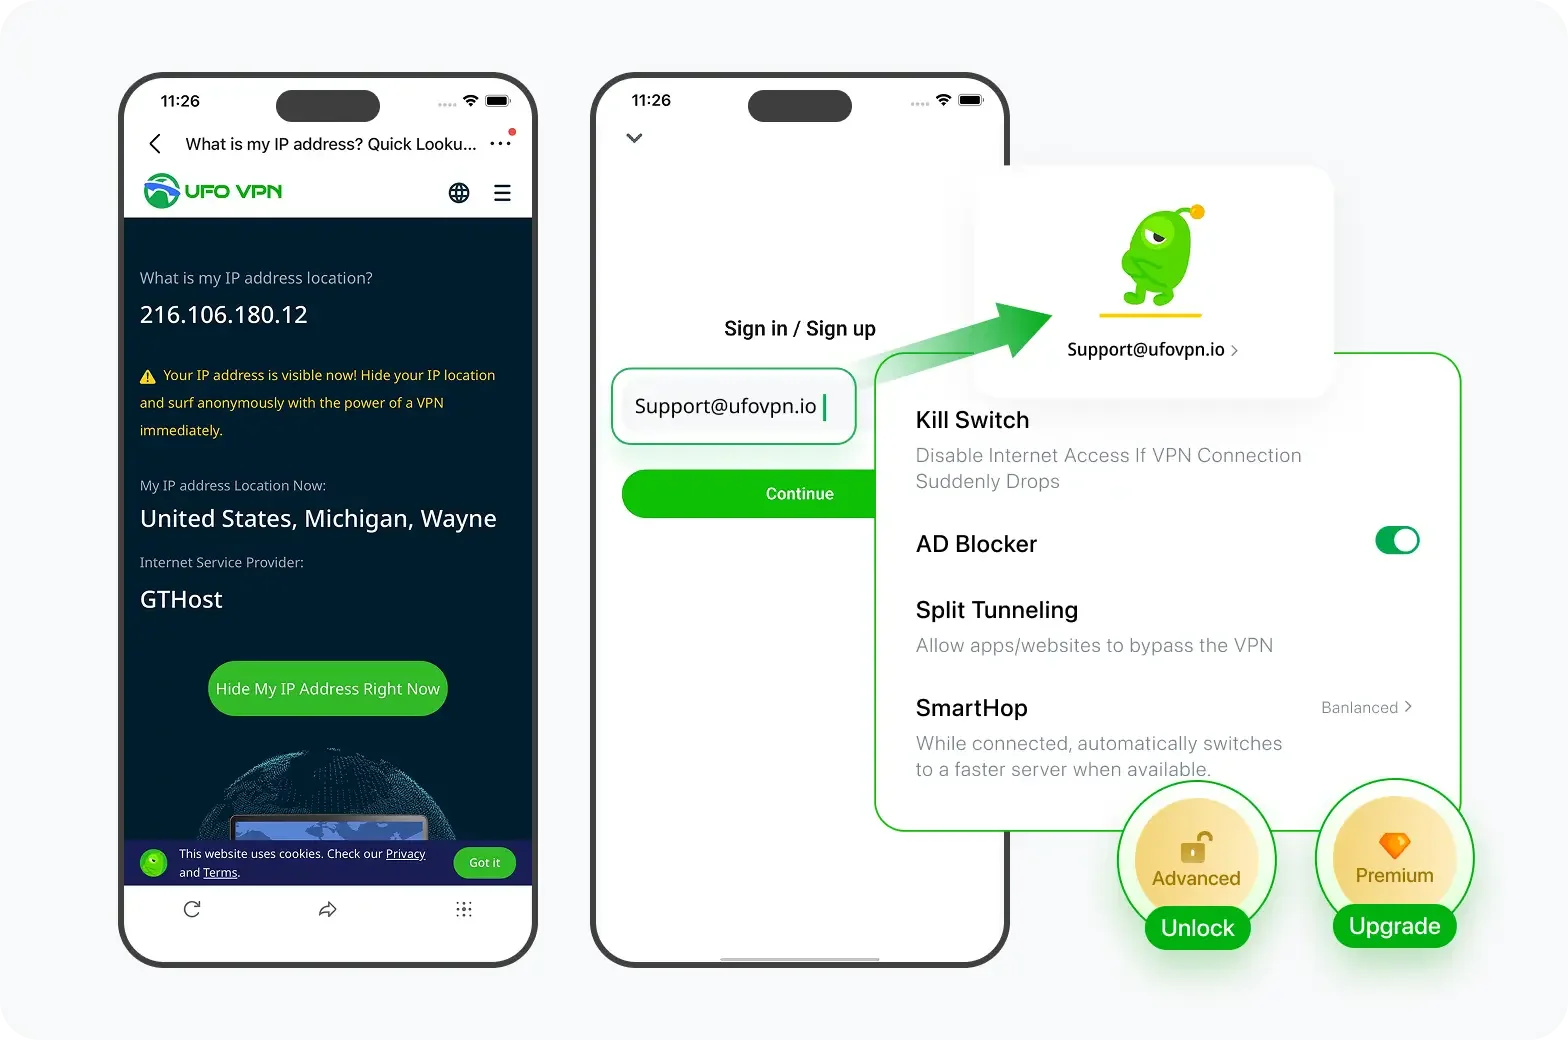 Step 1 install UFO VPN for AndroidGet free Android VPN from offcial website or Google Play Store. Follow the instructions for easy download. Then open the app and get ready to surf safely.
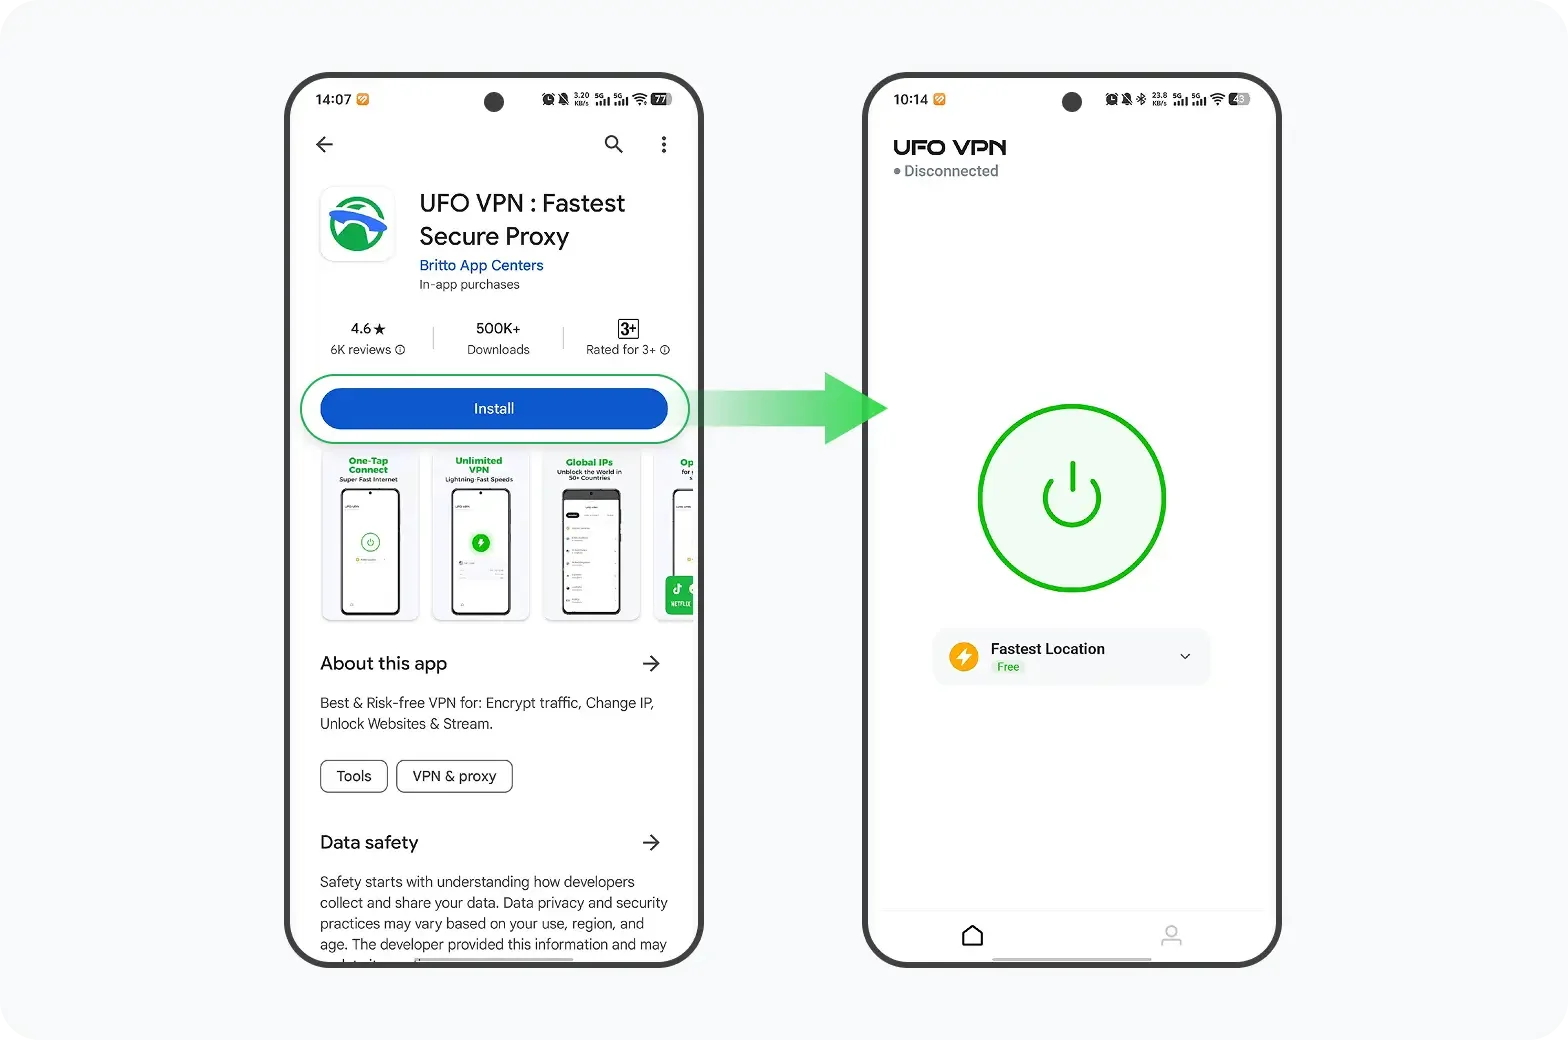 Step 2 Choose Your Ideal ServerUFO VPN is an all-in-one powerhouse for gaming, video streaming, social apps, and AI tools. The"Connect" button links you to the fastest server instantly, or you can choose among the server list manually via Location/ Video&Stream/Games for easy access.
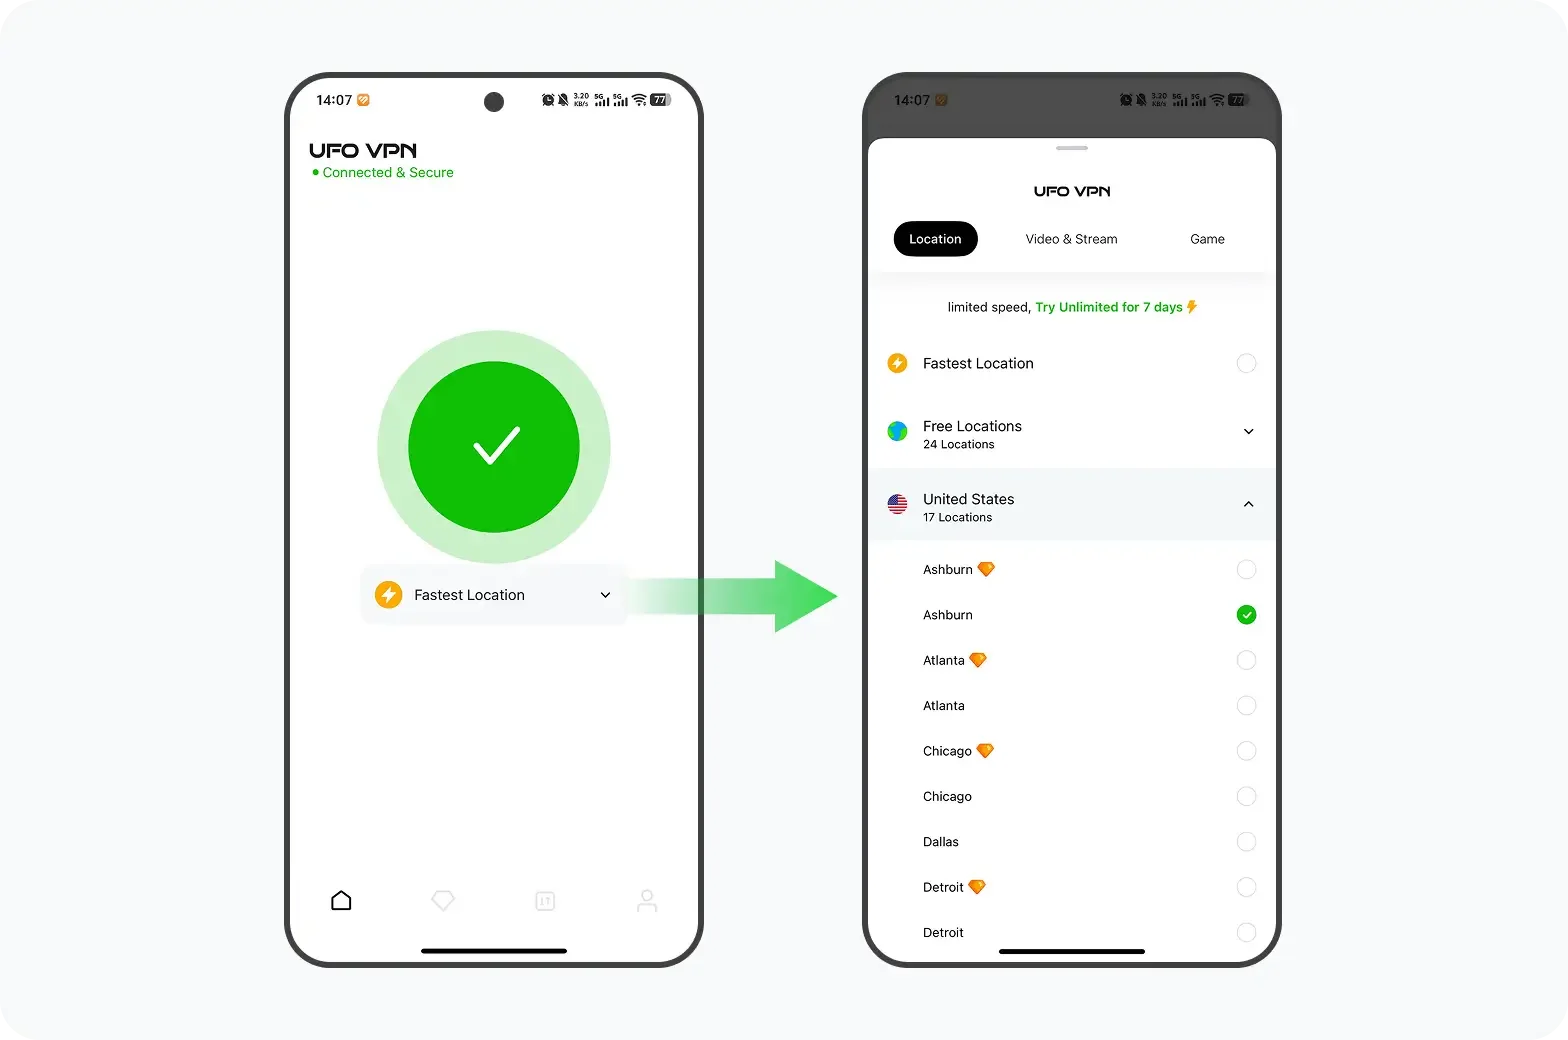 Step 3 Power Up Pro FeaturesPro users can look up current IP via built-in "What Is My IP" feature, and unlock premium features like 4K servers, turbo speeds, Kill Switch, Split Tunneling, and Multi-device login, keeping all your Android phones, tablets, and other devices safe at once.
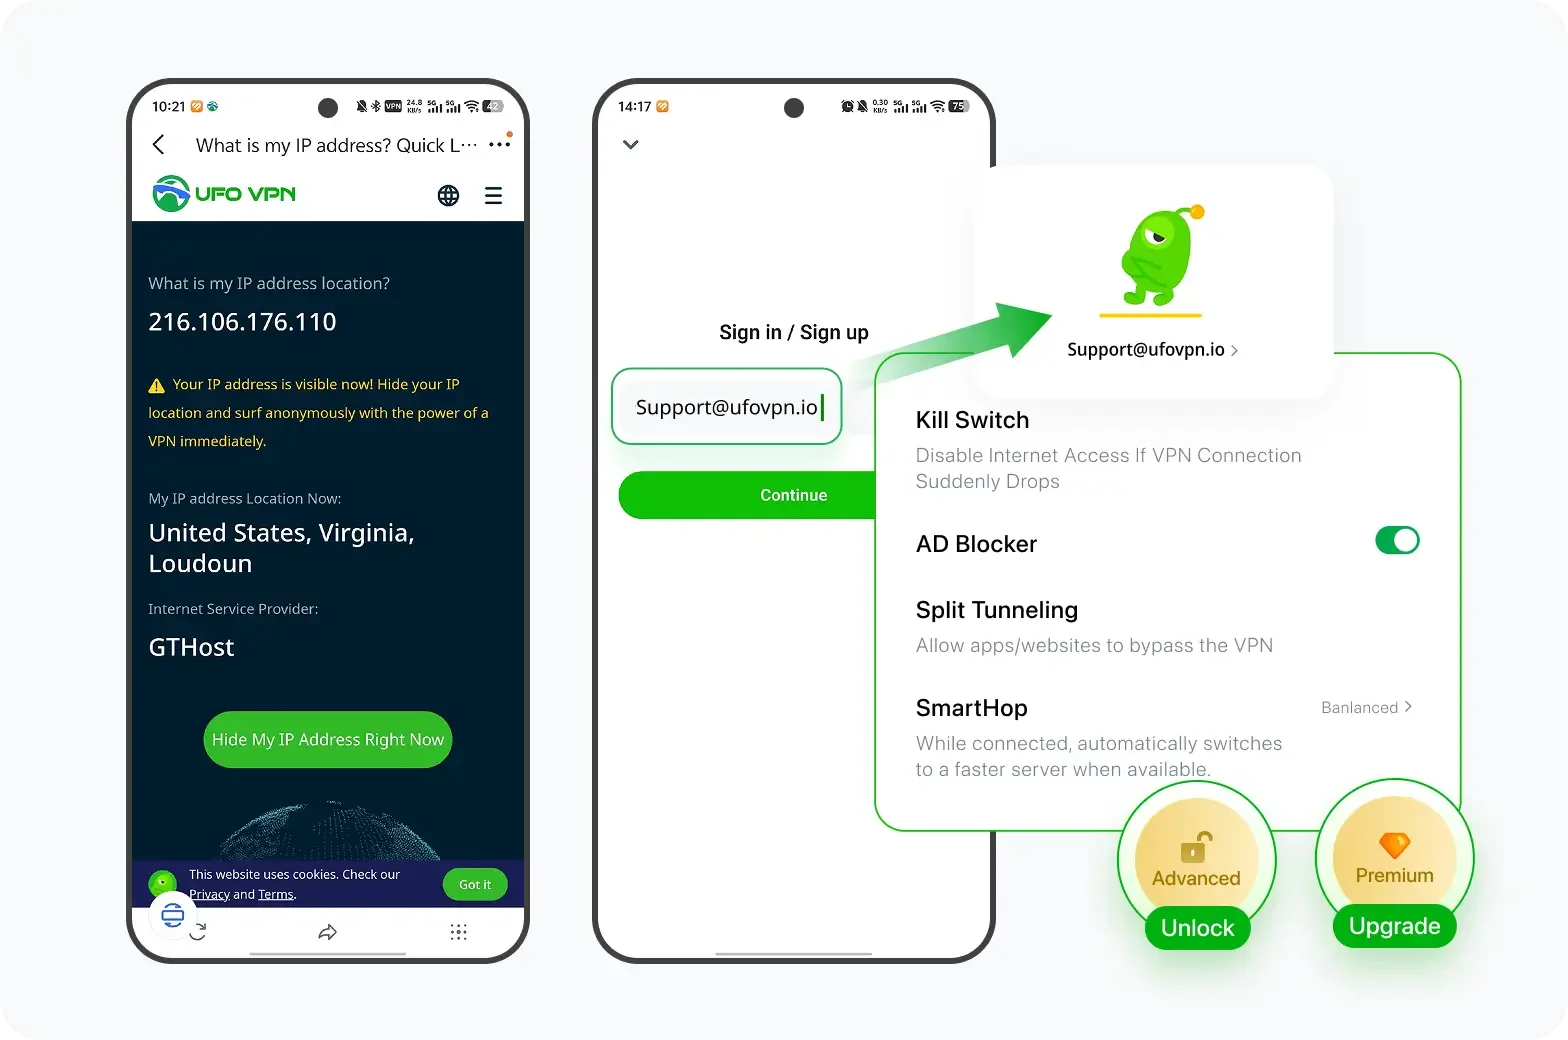
-
-
Backup Before Entering Safe Mode
-
On Android: Use Google Drive backup (Settings → System → Backup).
-
On iOS: Use iCloud or iTunes to preserve contacts, photos, and settings.
-
-
Clear Cache & Temporary Data
-
Android: Settings → Storage → Cached data → Clear.
-
iOS Safari: Settings → Safari → Clear History and Website Data.
-
-
Update Your OS and Apps
-
Always install the latest security patches—outdated software can trigger Safe Mode or exacerbate crashes.
-
-
Isolate Problematic Apps
-
If Safe Mode resolves your issue, uninstall the most recently installed or updated apps one by one to identify the culprit.
-
FAQs
What triggers Safe Mode automatically?
A severe system crash, a misbehaving app, or a stuck volume button during boot can force Safe Mode at startup.
Will I lose data in Safe Mode?
No. Safe Mode disables third‑party apps but does not erase personal files or settings.
Why doesn’t my non‑jailbroken iPhone support Safe Mode?
Apple keeps iOS closed—Safe Mode functionality exists only in jailbreak environments for tweak debugging.
My phone boots into Safe Mode repeatedly—what do I do?
Inspect and clean the volume buttons, check for rogue apps, or perform a factory reset (after backup).
Can Safe Mode fix random reboots and freezes?
It helps identify if third‑party software is at fault. If problems persist in Safe Mode, the issue likely lies in firmware or hardware.
Is using a VPN necessary during troubleshooting?
While not mandatory, a VPN like UFO VPN ensures downloads of diagnostic tools and remote connections remain encrypted and private, especially on public Wi‑Fi.
How long should I run Safe Mode?
Only long enough to diagnose or uninstall problematic software—typically 5–10 minutes. Then exit to restore full functionality.